
Shapes
The Shapes tool paints clean geometric shapes — lines, rectangles, ellipses and circles, stars, polygons, triangles, arrows, crosses, and polygons of your own — filled, outlined or both, each in a colour of its own, with a soft or a hard edge. A shape stays live after you draw it: you can move it, size it, turn it and change any of its settings, and nothing is painted until you say so. It paints every ticked channel, on textures or on vertex paint, into a layer of its own, on the GPU.
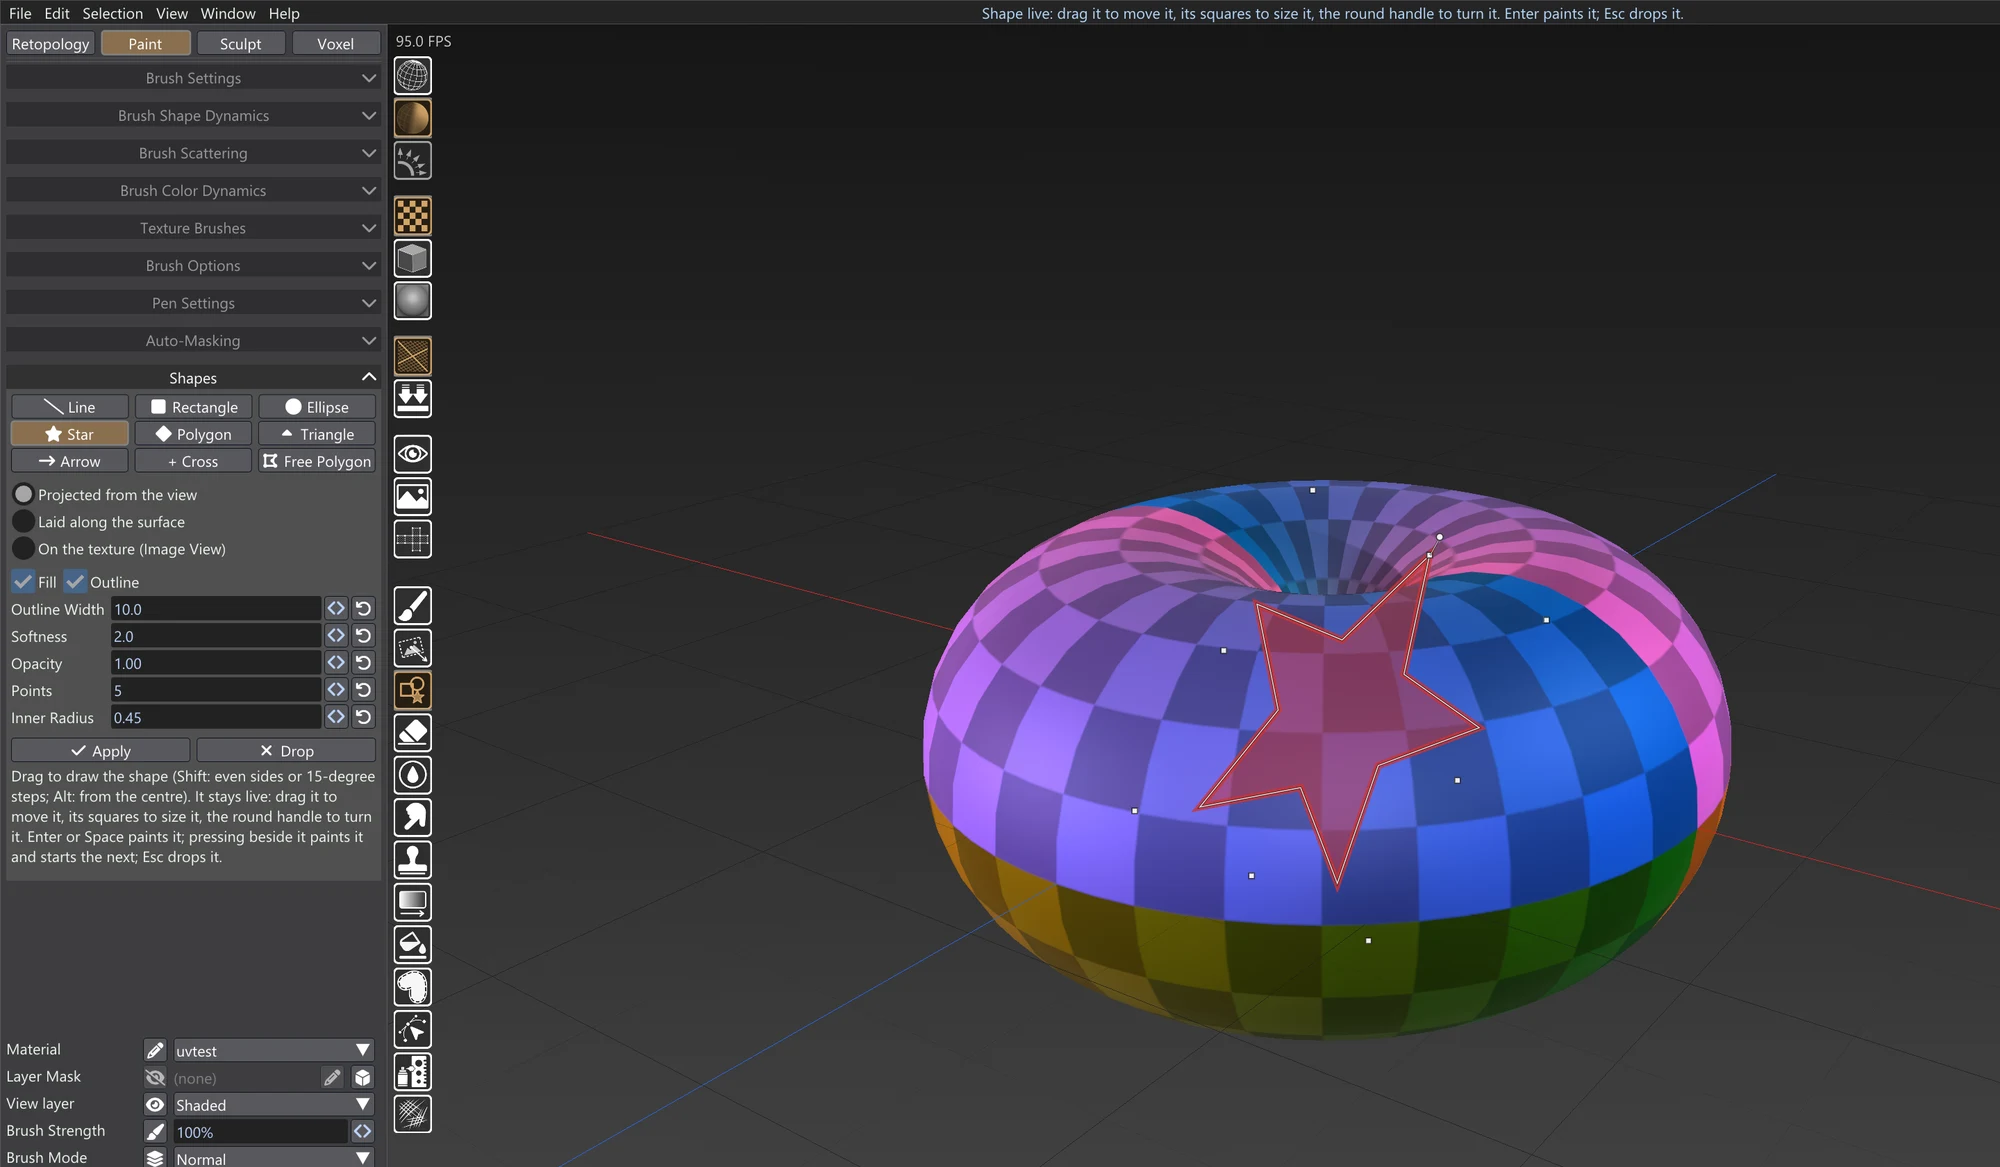
Picking the tool
Shapes is the icon under Alpha Drag in the tool row beside the sidebar. While it is the tool, the Shapes accordion appears in the sidebar and opens by itself.
Drawing a shape
Pick a shape in the accordion and drag in the viewport — on the model or beside it, since a shape may hang off the model's edge. A rectangle, ellipse, star, polygon, triangle or cross fills the box between where you press and where you let go; a Line or an Arrow runs from the press to the release, the arrow's head where you let go. A click without a drag draws nothing.
| Key | While drawing |
|---|---|
| Shift | Even sides — a square, a circle, a regular star — or, for a line or an arrow, steps of 15 degrees. |
| Alt (held during the drag) | Draws from the centre: the press is the shape's middle. |
With the Shapes tool, a plain press in the viewport never turns the view: Ctrl or Alt + drag, or the right mouse button, still do.
Free Polygon
Free Polygon is a shape of your own. Click its corners one by one; click the first corner again, or press Enter, to close it. Backspace takes back the last corner while you are clicking. Once closed it is live like any other shape, and every corner has its own handle.
The live shape
The shape you drew stays on screen with its handles, painted nowhere yet. Its fill and outline are previewed in their colours. With Laid along the surface, the outline is also drawn where it will land on the model, wrapped over its curves, and follows every change you make.
| Do this | To |
|---|---|
| Drag inside the shape | Move it. |
| Drag a square handle | Size it. The opposite side stays put; hold Alt to keep the centre still instead, and Shift on a corner to keep its proportions. |
| Drag the round handle above it | Turn it. Shift turns in steps of 15 degrees. |
| Drag a line's or arrow's ends | Move that end; the other stays. An arrow also has two handles across its head for its width. |
| Change a setting or pick another shape | The live shape changes with it. A shape turned into a Free Polygon keeps its outline, as corners you can drag one by one. |
| Enter, Space or Apply | Paint it. The tool and its accordion stay, ready for the next shape. |
| Press beside the shape | Paint it and start drawing the next one, keeping the tool. |
| Esc, Backspace, Delete or Drop | Throw it away without painting. |
Switching to another tool or tab throws the live shape away too. One Ctrl+Z takes a painted shape back: it went into a new layer named after the shape (Star, Arrow, ...), so you can also hide, fade or delete that layer later in the Layers window.
Where it goes
Three buttons under the shape buttons decide how the flat shape lands on the model.
| Placement | What it does |
|---|---|
| Projected from the view | The shape as you see it on screen, painted onto every part of the model it covers that faces you — like a stencil held up to the screen. Parts of the model hidden behind others are not painted. |
| Laid along the surface | The shape laid onto the surface round the point under its centre, following the model's curves, so it keeps its size and proportions on a curved surface instead of stretching where the surface turns away. It can wrap round a limb onto the far side. Its size is measured where its centre lands, so on a flat area facing you it paints just what the projected placement would. Put the shape's centre on the model: with the centre off the model it cannot be laid, and stays live. |
| On the texture (Image View) | Draw and edit the shape in the Image Viewer, flat on the image itself, whatever the UV layout does to it on the model. It paints the texture the Image Viewer shows — one of the Loaded Mesh's textures, or a generated texture of the Generated Mesh — on every ticked channel of that material. Where the model's UVs repeat the image across tiles, a shape drawn over any copy paints it. |
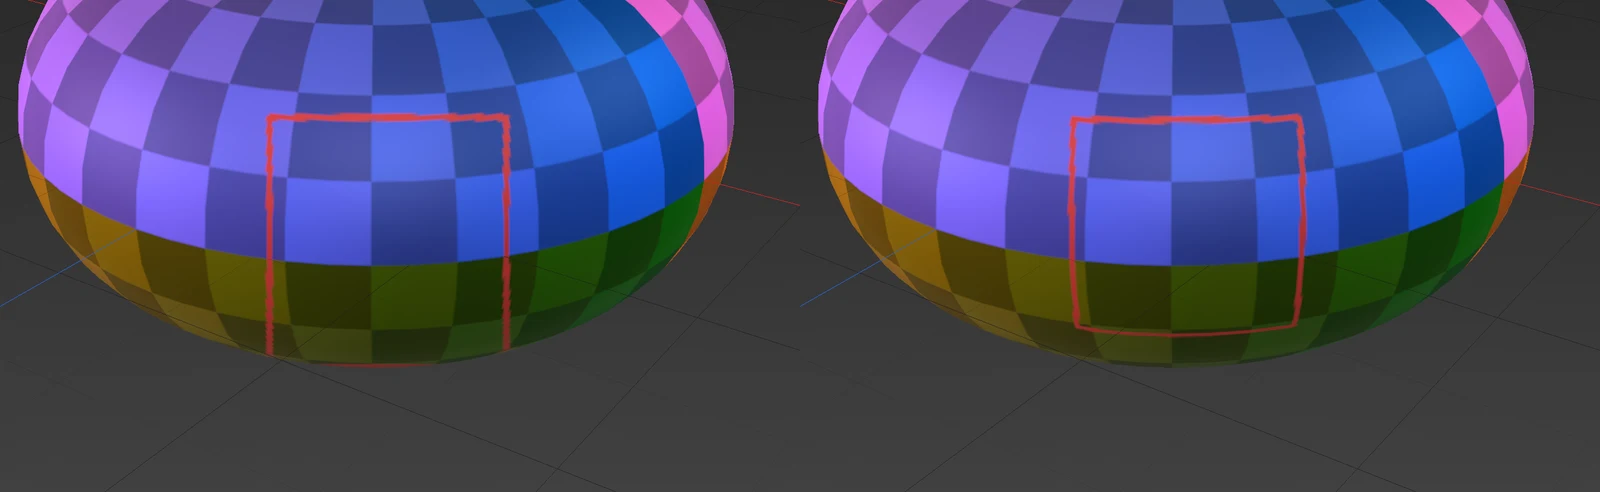
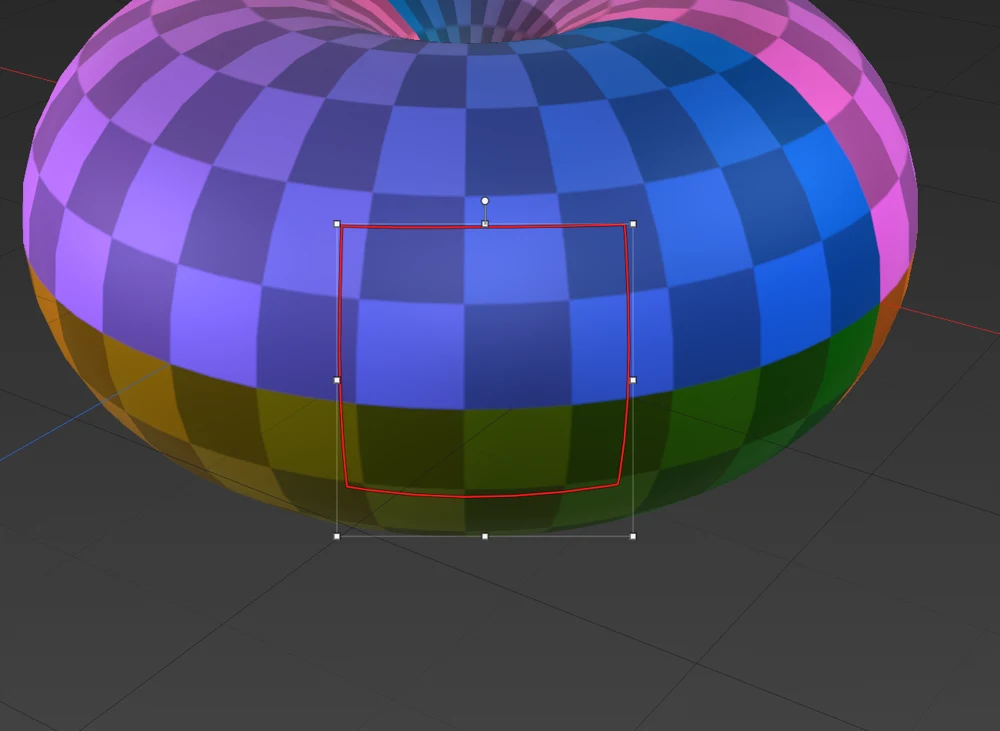
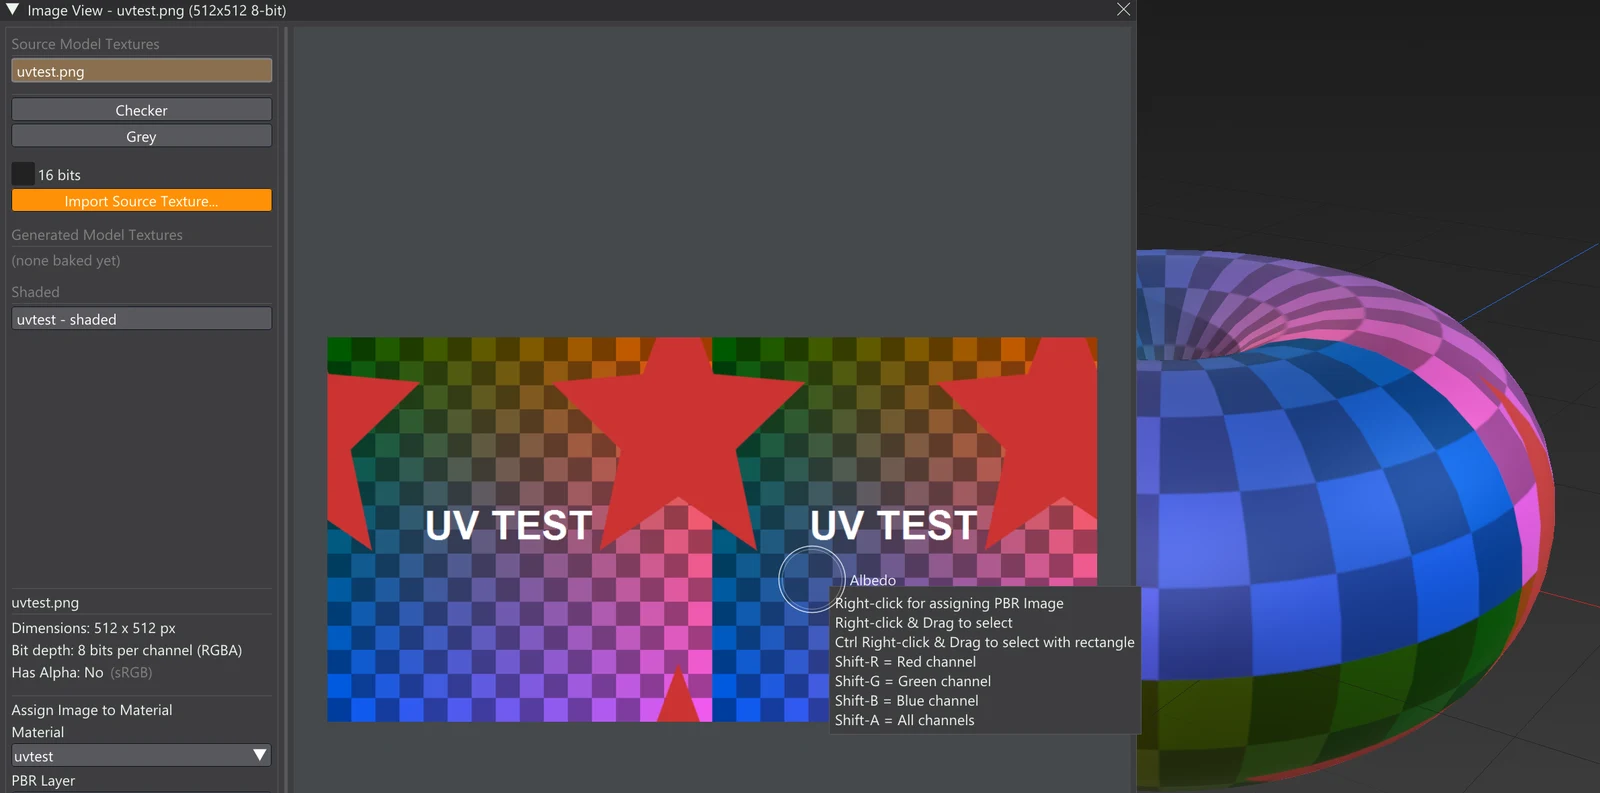
The Shapes accordion
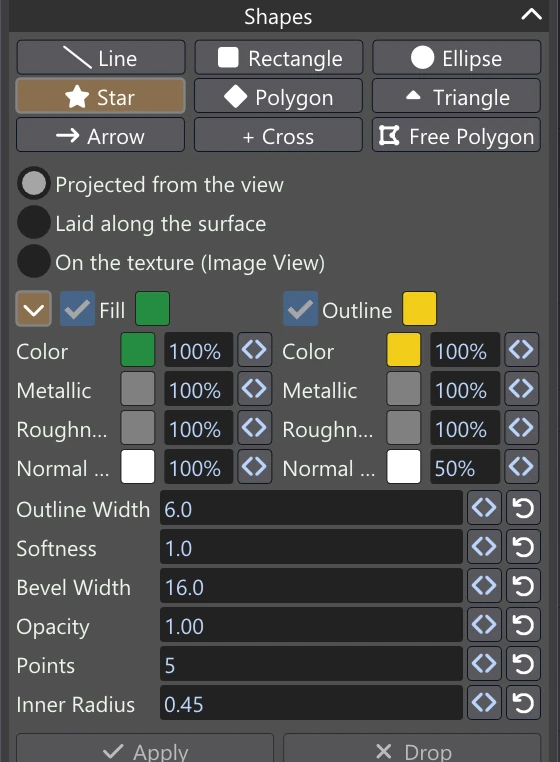
| Control | What it does | Range |
|---|---|---|
| The shape buttons | Line, Rectangle, Ellipse, Star, Polygon, Triangle, Arrow, Cross, Free Polygon. | |
| Placement | The three buttons described above. | |
| Fill and its swatch | Paint the inside of the shape (for a line, the line itself), in the swatch's colour. Click the swatch to pick it. Fill and Outline sit side by side on one row. | |
| Outline and its swatch | Paint a band round the shape's edge, half inside and half outside it, in the swatch's colour. With both ticked you get both, the band's colour shading into the fill's across a soft edge; with neither, the shape paints nothing. | |
| The chevron before Fill | Opens the fill's and the outline's channels underneath, in two columns: see below. | |
| Outline Width | How wide the outline band is. | 0.5–100 px |
| Softness | How far the edge fades out; 0 is a hard edge. | 0–50 px |
| Bevel Width (with the Normal Map ticked) | How far in from each edge the shape's bevel climbs in the normal map. | 0.5–100 px |
| Opacity | How strongly the shape paints, on top of each channel's own strength. | 0–1 |
| Line Width (Line) | How thick the line is. Its ends are round. | 0.5–200 px |
| Corners (Rectangle) | How round the corners are: 0 square, 1 as round as the shorter side allows. | 0–1 |
| Points, Inner Radius (Star) | How many points, and how deep the notches between them are. | 3–64, 0.05–0.95 |
| Sides (Polygon) | How many sides. | 3–64 |
| Head Length, Shaft Width, Double-headed (Arrow) | The head's length as a share of the arrow, the shaft's width as a share of the head's, and a head at each end. | 0.05–0.9, 0.05–1 |
| Arm Width (Cross) | The arms' width as a share of the cross. | 0.05–0.95 |
| Apply / Drop | Paint the live shape (the tool stays for the next) / throw it away. |
Widths are in pixels of the view as you draw the shape (of the Image Viewer, on the texture), whatever the zoom: the width you see is the width you get. The shape paints the ticked rows under Color channels and Greyscale channels, and the Normal Map when it is ticked, each at its own strength: the colour rows (Color / Albedo, Emission, ...) take the swatch colours, and the greyscale rows (Roughness, Metallic, Height, Displacement, ...) keep their own values, so one shape can paint a red, rough decal in one go. The swatches start as the brush colour the first time you pick the tool. The shape respects Auto-Masking, the Paint Mask and a layer mask like the other fills.
The fill's and the outline's channels
The chevron before Fill opens two columns under the Fill and Outline row — the left one is the fill's, the right one the outline's. Each lists the channels ticked in the palette: the channel's name, a swatch and a strength slider. So the fill and the outline can paint different things: a fill with no height and an outline raised to 0.5, or a shiny metal fill with a rough outline. Color's swatch is the Fill or Outline swatch above it; a colour row has a colour swatch, and a greyscale row a grey one — click it to set the value. Until you change a channel it follows its palette row; right-click a cell to make it follow the palette again.
On the Normal Map row the value is how steep the shape's bevel is: 1 is 45 degrees, 0.5 about 27, 0 flat. The shape's edges are painted into the normal map as a slope Bevel Width wide (in pixels of the view, like the other widths), and the top stays flat. With the outline ticked, its band has its own steepness and the fill its own, each change of height bevelled: give the outline 0.5 and the fill 0 for a raised rim with a slope on both sides. It paints the normal map on textures and on vertex paint alike (on points the bevel can only be as fine as the mesh), on the CPU. A material with no normal map yet asks to create one first; the shape stays live meanwhile, so press Enter again once the image exists.
Tips
- For an outline only — a ring, a frame, a star's edge — untick Fill and tick Outline.
- A little Softness keeps the edge from looking stair-stepped on a low-resolution texture.
- To paint a row of shapes, keep pressing beside the last one: each press paints the live shape and starts the next, without putting the tool away.
- For a decal that should follow a curved part — a stripe round an arm, a badge on a helmet — use Laid along the surface.
- For an embossed badge, tick the Normal Map and give the outline a height in the channel columns: the rim is bevelled into the normal map, on a layer of its own that you can fade or delete later.