
Stitch Tool
The Stitch Tool lays a tiled strip along a curve you place on the model: a row of stitches, a seam, a groove, a zip, a rivet row, a leather welt. The strip is built from a stitch brush — a sheet of pieces (a start cap, a few variants, an end cap, and optional corner pieces) with colour and relief layers — laid one piece after another so the pieces join along the whole length. The curve stays editable: move a point and the stitch is laid again. In Painting the stitch paints the model’s textures or vertex colours; in Sculpting it presses its relief into the mesh; either can do both at once.
Picking the tool
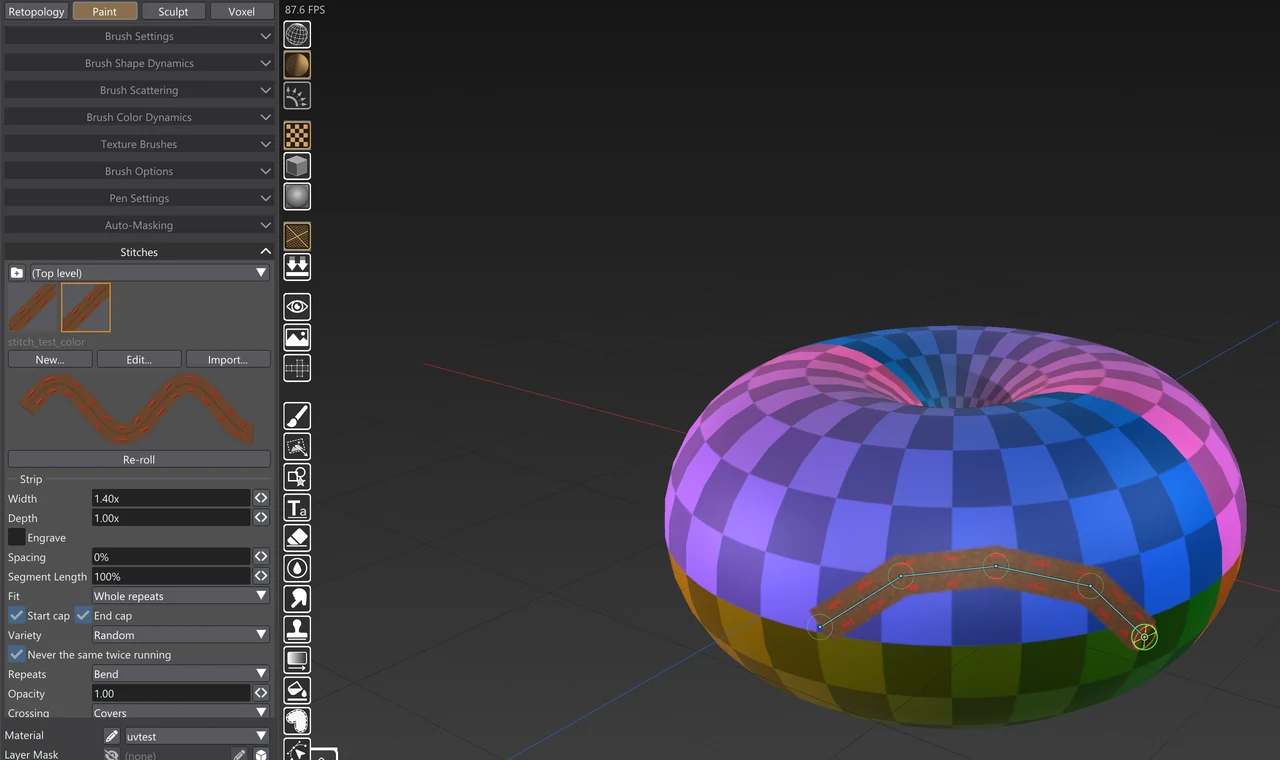
In Painting, pick the Stitch Tool from the tool row, under the Stroke Tool. In Sculpting, its button sits in the side bar beside the Stroke Tool’s; it puts the sculpt brush away while it is on. Either way the Stitches accordion opens in the sidebar. The path itself is drawn exactly as a Stroke Tool path is: click the model to place points, drag while clicking to pull a point’s handles, press Enter to finish. Every point’s size is the strip’s width there ([ / ] on a selected point), so a stitch can swell and narrow along its length.
The brush library
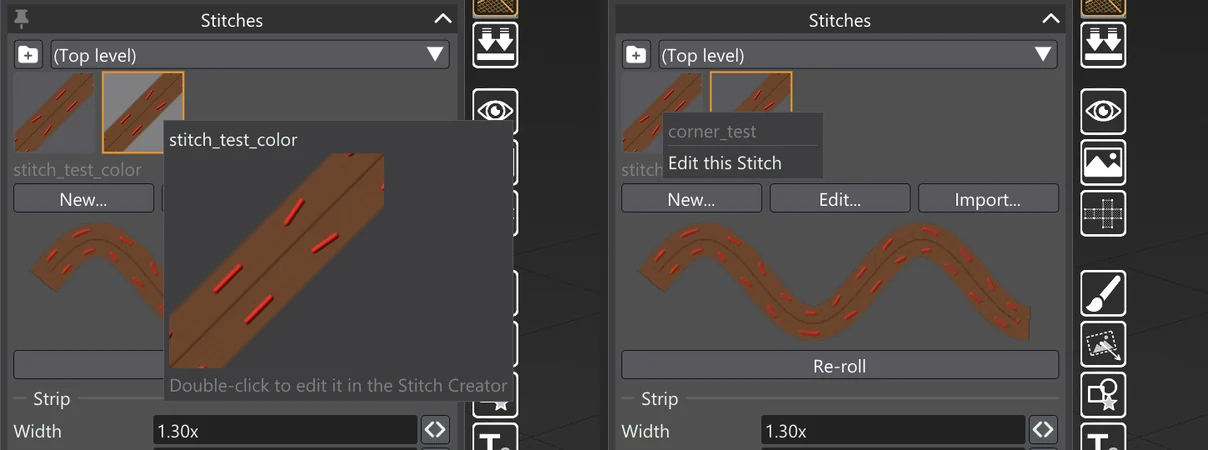
The top of the accordion is the stitch brush library: a group dropdown (the folder button beside it makes a new group), then the brushes of that group as square thumbnails, five or more to a row. Click a thumbnail to pick the brush — if a stitch is selected, it is laid again with the new brush at once. Rest the pointer on a thumbnail for a larger view of it.
- Double-click a thumbnail, or right-click it and choose Edit this Stitch, to open that brush in the Stitch Creator.
- New... opens the Stitch Creator on a new brush; Edit... opens the picked one.
- Import... brings
.vxstitchfiles into the group shown, or makes a simple height brush from each greyscale sheet image (PNG, TIFF, JPEG, JPEG XL). Pick as many files as you like. - Import a Folder... brings in every
.vxstitchfile and sheet image in a folder (not its sub-folders) as a new group named after the folder. The files go in one at a time while you keep working; the status line counts them and says how many could not be read. When it is done the group is shown with its first brush picked. A brush whose name is already in the group is replaced.
The search box under the group finds brushes in every group: type words, and the brushes whose name, group or tags contain all of them are shown (case does not matter). Clear it to go back to the group. Resting the pointer on a thumbnail shows the brush’s tags and, if it has one, its real width.
Under the buttons, a live preview draws the picked brush along an S with the settings below — the real layout, caps, joins and random picks, not an approximation. Re-roll picks the variants and flips afresh (for a selected stitch, it lays it again with the new picks).
Stitches from edges
From Edges lays stitches along edges the model already has, instead of a path you draw. Pick which edges, then press Make Stitches:
| Edges | Which |
|---|---|
| Selection outline | The border of the selected faces (and the mesh’s own open border where selected faces reach it). |
| Material borders | Where two materials meet. |
| UV seams | Where the UV map is cut. |
| Marked seams | The seams marked on the Generated Mesh. |
Only selected faces keeps the edges of the faces you have selected. Each run of edges becomes a stitch of its own, with the picked brush, the settings below and the brush size as its width, all in one undo step; each stays an editable path. Where runs cross or branch, a stitch goes straight on through (turning no more than 45°), so the brush’s + and T pieces go there (see Where stitches meet); sharp turns become corner points. Runs shorter than twice the strip’s width are left out. More than 16 runs at once makes nothing — every stitch has a layer of its own — and the status line asks you to select the faces you want and tick Only selected faces.
Strip settings
These belong to the stitch being edited, or to the next one when none is selected. Every change lays the selected stitch again.
| Control | What it does | Range |
|---|---|---|
| Width | The strip’s width, times each point’s size — or, with Real size, times the brush’s real width. | 0.1–4× |
| Real size | Lay the strip as wide as the brush is in reality, whatever the points’ sizes. Offered when the brush has a Real width, shown beside it (for example “Real size (6.5 mm)”). One unit of the model is a metre, as the grid reads. | |
| Depth | How deep the relief is, times the brush’s own depth. | 0–10× |
| Engrave | Press the relief in instead of raising it. | |
| Spacing | A gap after each piece, as a share of its length. | 0–200% |
| Segment Length | Stretch or squash each piece along the path. | 25–400% |
| Fit | Whole repeats: the pieces stretch a little so a whole number fit between the caps and corners. Fixed length: each piece its own length, the last one cut short. | |
| Start cap / End cap | Lay the brush’s start and end pieces at the ends of the path. A closed path has none. | |
| Variety | How the variants are picked along the path: Random (by each variant’s weight) or In order. | |
| Never the same twice running | No variant twice in a row (when the brush has two or more). | |
| Repeats | Bend: each piece bends with the path (a groove). Rigid: each piece stays straight (a stitch). | |
| Opacity | How strongly the stitch is laid. | 0–1 |
| Crossing | Where this stitch crosses another (or anything painted under it): Covers lays it on top, Brighter keeps the brighter of the two, Adds adds them. It is the blend mode of the stitch’s layer, the same one the Layers window shows. | |
| Relief Crossing | Where this stitch’s relief crosses the relief of stitches laid before it (shown where the relief is sculpted: Sculpting, or Also sculpt): Adds sums the two, Highest keeps the higher of the two (the deeper, when engraved), Covers lays this one over the other. See Sculpting a stitch. | |
| Edge Fade | How much of each side of the strip fades into the surface, with the fade’s curve (Ease in / Ease out, or a preset) under it. | 0–100% |
| Corner Angle | A turn at least this sharp is a corner: the brush’s corner piece goes there. | degrees |
| At a Corner | For a sharp turn with no corner piece to lay: Bend the strip through it, or Break it there (end cap, then start cap). | |
| Jitter | Small random changes per piece: Turn, Offset across, Size and Depth. Changing them never changes which variants are picked. |
Recolour
A brush may carry two masks that mark which parts are the thread (the Foreground) and which are the leather or base (the Background). Each has a colour swatch and a mode: Image Colour keeps the brush’s own colour, Tint keeps its light and shade in the swatch’s colour, Replace paints the swatch’s colour flat. A brush with masks but no colour image is painted in the two swatches.
Channels
The ticks under Channels choose which of the brush’s layers are painted, wherever the model has that channel: Colour, Metallic, Roughness, AO and Emissive. Under Relief into: the brush’s relief — its height, or its own normal layer — can be painted too:
| Tick | What it paints |
|---|---|
| Height | The relief into the Height (bump) channel: grey, mid-grey the surface, times Depth. |
| Normal | The relief into the Normal Map, laid over the model’s own normals: the slope of the relief, or the brush’s own Normal layer. On by default — the way to show a stitch on a mesh too coarse to sculpt. |
| Displacement | The relief into the Displacement channel: grey, mid-grey no push, times Depth. |
A greyscale-only brush has no colour, so in Painting it paints only what you tick here. All three work on vertex colours too. If you tick a channel the material has no image for, the status line says so — add the channel in the Paint palette (+) first.
Where stitches meet
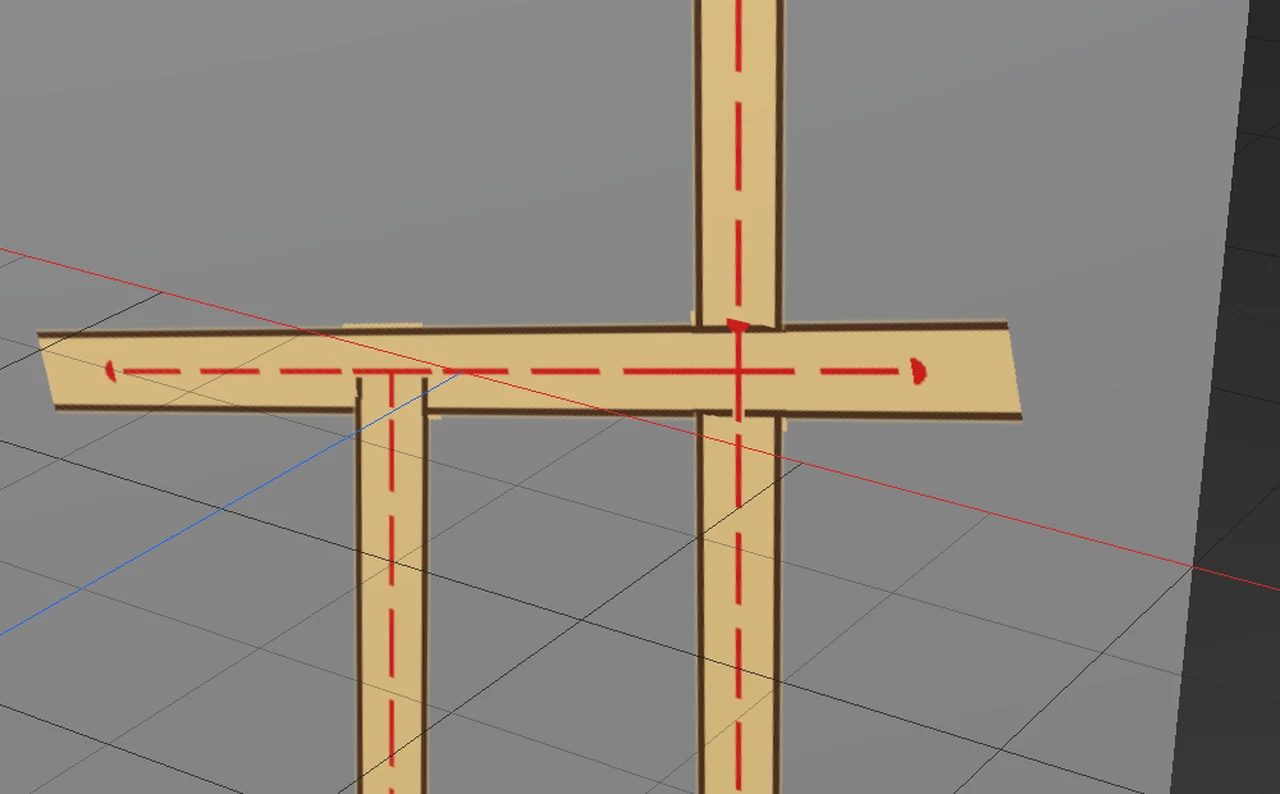
When stitches meet, the brush’s T Junction and Cross pieces are laid there (if the brush has them — see Segments):
- T — a stitch that ends on another (its end inside the other’s strip, or drawn a little past it) is cut back to the other’s edge, with no end cap there, and the other stitch lays its T piece where they meet, mirrored when the branch comes from the left.
- + — where two stitches cross away from their ends, the newer one lays its Cross piece over the older one.
The pieces lean to follow the real angle of the stitch that meets them. Two ends that meet (an L), stitches running alongside each other, and meeting points closer together than the strip is wide are left as they are. Move, delete or undo a stitch and the ones it meets are laid again to match. Stitches with Parallel Lines or Symmetry do not take part.
Sculpting a stitch
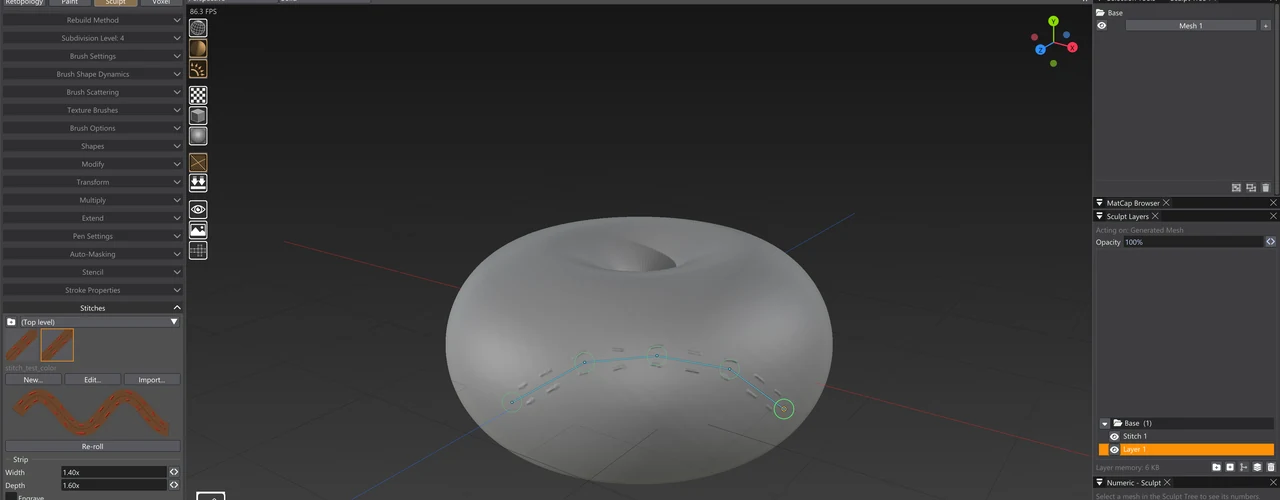
In Sculpting, the stitch moves the mesh’s points: the brush’s height along each point’s normal, and a vector displacement brush across, along and out of the path. The relief goes into a sculpt layer of the stitch’s own, so it can be hidden, weakened or deleted on its own, and laying it again replaces it exactly. Also paint (Sculpting) and Also sculpt (Painting) are the same switch seen from each side: the stitch both paints and sculpts, and one Ctrl+Z undoes both.
Sculpt layers add up, so where two stitches’ reliefs cross, the crossing would stand twice as high. Relief Crossing decides it instead: with Highest or Covers the stitch is laid against the relief of the stitches laid before it, so the crossing stands as high as the higher one, or as this one alone. Move or delete the stitch underneath and the ones laid over it are laid again to match.
A relief needs points to move: the accordion says how many of the mesh’s points lie across the strip, and warns when there are too few to show it, with a Subdivide button for the Generated Mesh. On a coarse mesh, paint the relief into the Normal channel instead.
Finishing, dropping and editing later
Apply (or Enter) finishes the stitch; the tool stays on for the next one. Drop deletes the stitch being laid and its layer. A finished stitch stays editable: the Paths — Paint window lists it with a scissors mark, and picking it there brings back the Stitch Tool with its settings. Every edit is an undo step. Stitches use the Stroke Tool’s path options too — Closed loop, Symmetry (a true mirror image: a slanted stitch slants the other way), Walk geodesically, and Parallel Lines for double stitching — see Stroke properties.
Stitches in projects
A saved project keeps the stitch brushes its stitches use, so it opens with its stitches intact on another machine, or after a brush file is renamed or deleted. When a stitch’s brush came only with the project, the accordion says so and offers Add to Library, which copies the brush into a From Projects group of your library (Regular and Ultra).
Editions
Every edition lays stitches. Free and Light use the stitch brushes that ship with Vertexix: they can open the Stitch Creator and try it, but not save a brush, import one (or a folder of them), or add one from a project to the library. A project made in Regular or Ultra keeps its stitches in Free and Light; a stitch whose brush does not ship is locked there — it stays as it is laid and can be hidden, renamed or deleted, and picking a shipped brush for it unlocks it.
Keys
These apply while the Stitch Tool is on, alongside the Stroke Tool’s keys.
| Key | What it does |
|---|---|
| Enter | Finish the stitch (Apply); the tool stays on. |
| Esc | Stop adding points; again, let go of the stitch. |
| [ / ] | Narrow / widen the strip at the selected point. |
| Ctrl+Z / Ctrl+Y | Step back and forward through stitch edits. |