
The Bezier Pen
Every tool in Vertexix that draws a bezier curve works the same way, so what you learn in one carries to the others. These tools are:
- Voxel mode's Curve, Lathe and Free Form shapes, and their twins under Sculpt's Shapes.
- The Stroke Tool in Paint, and Sculpt Paths.
- The Quad-Patcher's Strip, Rails, Patch and Loop Band.
The pens and the keys are the ones Photoshop uses, so if you know its Pen Tool you already know most of this.
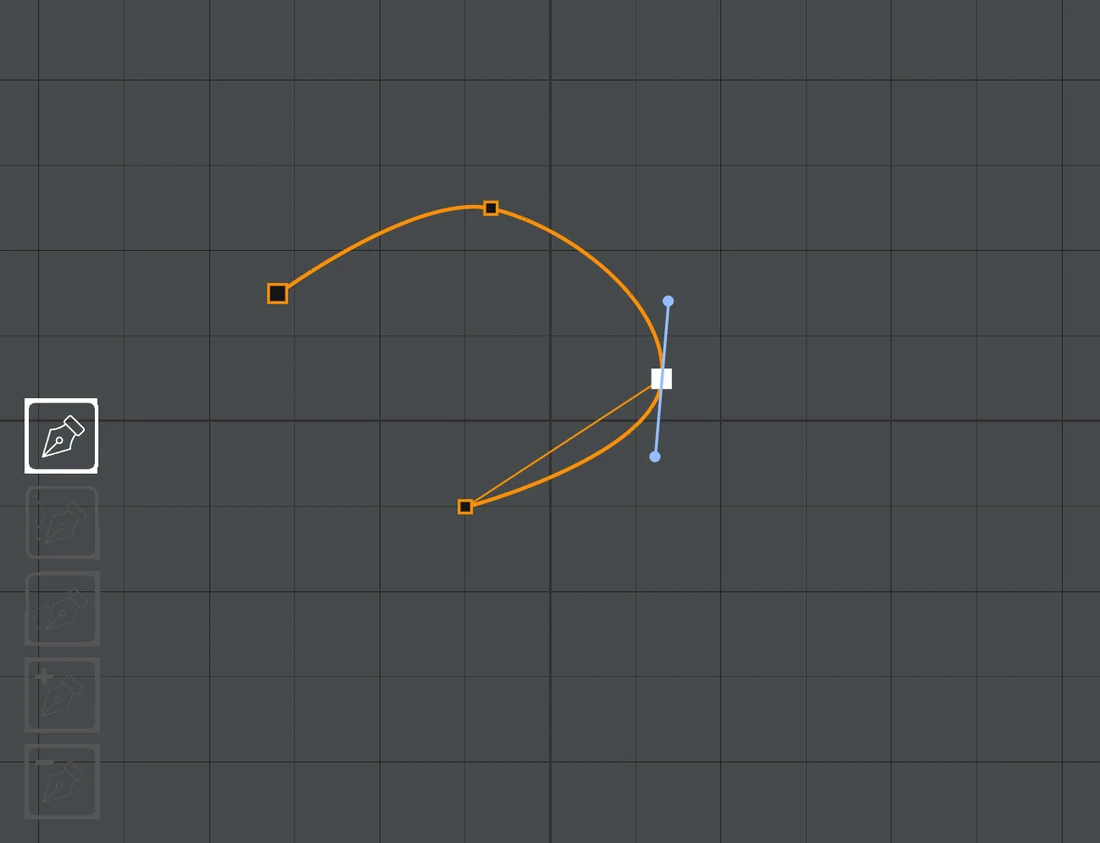
The five pens
While a bezier tool is in use, its five pens are drawn in the bottom-left corner of the view you are working in. The pen in use is bright; the other four are dim. Click an icon to switch pens. Scroll the mouse wheel over the icons to make them bigger or smaller (the bottom icon stays where it is).
| Pen | Key | What a click does |
|---|---|---|
| Pen Tool | P | Click to place a corner point. Click and drag to place a smooth point: the drag pulls its two handles out, mirrored. Click a point to drag it. |
| Freeform Pen | P | Drag to draw freehand. When you let go, the line is turned into the few points that hold its shape, each a smooth point. |
| Curvature Pen | P | Click to place points; the curve flows smoothly through all of them, and its handles are worked out for you, again whenever a neighbouring point moves. Drag while placing to move the point you just placed. |
| Add Anchor Point | + | Click the curve between two points to add a point there. The curve keeps its shape. |
| Delete Anchor Point | - | Click a point to remove it. |
P steps through the three drawing pens (Pen, Freeform, Curvature) and Shift+P steps back. + is Shift+= on most keyboards. These keys only act while a bezier tool is in use; the rest of the time they keep their usual jobs. All four can be changed in Settings > Keyboard, in the Bezier Pen group.
Dragging points
Press on a point and drag to move it. Hold keys while you drag:
- Shift moves the point slowly, at a fifth of the speed of the mouse, for fine placing.
- Ctrl locks the point to the direction it has moved furthest in since you pressed: straight across or straight up and down.
- Alt turns off snapping into line (below) for that drag.
Press first, then hold the key. In Paint, Sculpt and the Quad-Patcher a Ctrl press turns the view and a Shift press has its own job, so the keys only change a drag that has already started. In Voxel mode's views, Shift on the press adds the point to the selection, and all the selected points move together.
Alignment lines and snapping
As you drag a point, Vertexix watches whether it lines up with any other point of the curve, straight across or straight up and down. When it is within a few pixels of lining up:
- An alignment line is drawn to the point it lines up with. The line is always horizontal or vertical, never diagonal. In Voxel mode it shows in every view where the two points line up.
- The point snaps into line, so it lines up exactly. Hold Alt while dragging to place it freely.
On a model's surface (the Stroke Tool, Sculpt Paths and the Quad-Patcher), the point lines up on screen and then stays on the surface.
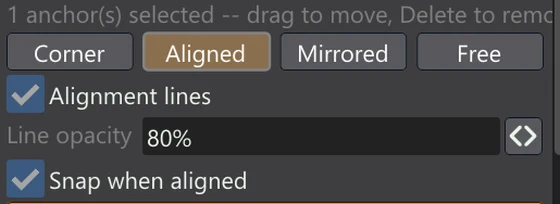
Three settings control this. They appear with each tool's own controls: the Numeric window for Voxel and Sculpt shapes, Stroke Properties for the Stroke Tool, and the Quad-Patcher window. They are shared by every tool and kept between sessions.
- Alignment lines turns the lines on or off.
- Line opacity sets how strongly they are drawn.
- Snap when aligned turns the snapping on or off. With it off you still see the line, and can line a point up by eye.
Handles and their modes
A smooth point has two handles, which set the direction and the pull of the curve on each side. The selected point shows its handles; drag a handle's end to reshape the curve. Each point has one of four modes, chosen with the Handles buttons:
| Mode | What the handles do |
|---|---|
| Corner | No handles: a sharp corner. |
| Aligned | Smooth. The two handles stay in a straight line, but each keeps its own length. |
| Mirrored | Smooth and even. The two handles are always exact opposites. |
| Free | Each handle moves on its own, for a corner with curved sides. |
The Alt key changes modes as you work, as in Photoshop:
- Alt+click a point to convert it: a smooth point becomes a corner, and a corner becomes a smooth (Aligned) point.
- Alt+drag a handle to break it: the point becomes Free and only that handle moves. This works while you are pulling the handles out of a new point, too.