
2. Manual Remesh Settings
This is AutoRemesher's own parameter panel
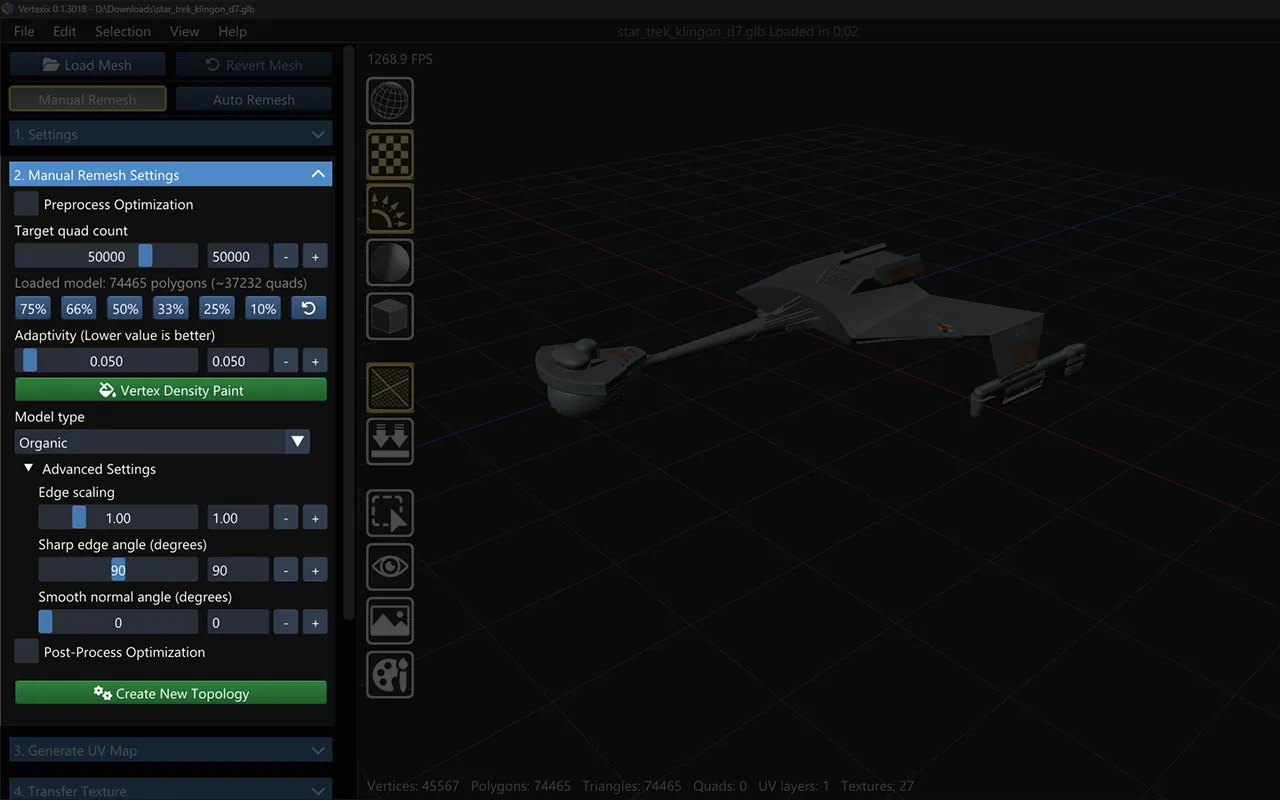
Target quad count & presets
A logarithmic slider from 100 to 500,000, defaulting to roughly the loaded model's own polygon count. Seven quick-preset buttons (75% / 66% / 50% / 33% / 25% / 10% of the loaded polygon count, plus a reset button) let you dial density in seconds. A hint line shows whether Create New Topology below will act on the current Selection Tools selection or redo the whole mesh.
Adaptivity
0–1, how much quad density follows surface curvature (0 = uniform). Higher values push the result further from the target quad count and slow the solve; the default of 0.05 tracks the target count closely and produces cleaner results in practice.
Vertex Density Paint
A toggle button here opens the Vertex Density Paint brush window, letting you mark regions of the loaded mesh for denser output beyond the target quad count.
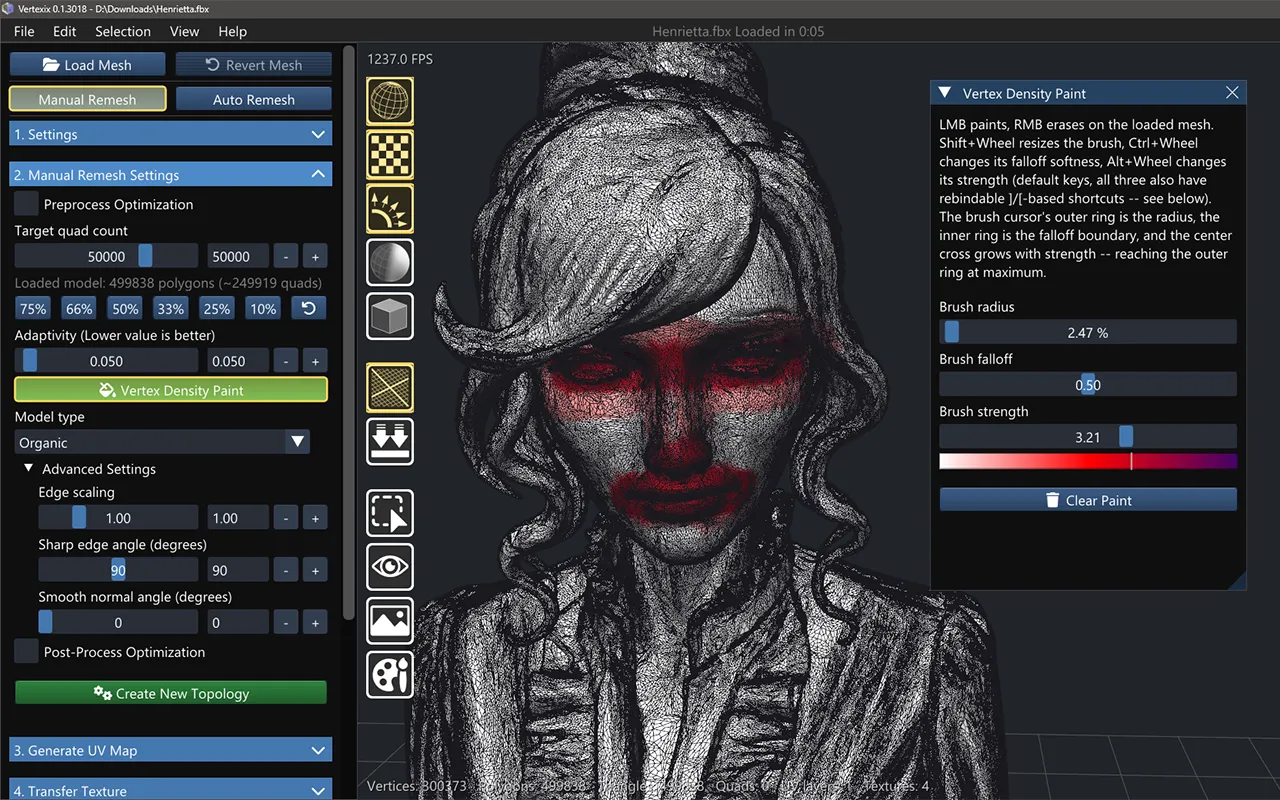
Three values drive the brush: Brush radius (1–100%, a percentage of the largest brush this model allows), Falloff (0–1 — 0 is a hard-edged disc, 1 a soft ramp across the whole radius), and Strength (0.1–5.0, the density multiplier the next stroke lays down — 5 packs roughly five times the edges into that area). Painting replaces a region's weight rather than adding to it, so raising Strength only changes what you paint next, never what's already down. All three adjust live while painting too (Shift/Ctrl/Alt+Wheel, or the rebindable ]/[-family shortcuts), and Strength doubles as a clickable gradient bar — white at 0, red at the midpoint, purple at 5 — the same colors the paint overlay uses on the mesh itself as you work. Clear Paint resets every painted vertex back to zero. See Vertex Density Paint for the full brush reference, including how painted density actually feeds the Manual Remesh solve.
Model type & Advanced
Model type — Organic (smooths more freely) or Hard Surface (preserves sharper features). The Advanced tree adds Edge scaling, Sharp edge angle, and Smooth normal angle thresholds, plus a Post-Process Optimization checkbox that reorders the created topology's vertex buffer for GPU cache locality.
Create New Topology
Enabled once a mesh is loaded, and re-runnable: with something selected in Selection Tools, a click retopologizes just that material or group and merges the result into the existing topology; with nothing selected, it redoes the whole mesh, warning first if that would discard existing scoped work.