
Node Layers
A Node Layer is a layer in a material's layer stack whose pixels come from a node graph rather than from painting. It sits in the Layers window like any other layer, with a graph icon before its name, and it is made again from its graph whenever the graph changes. This page covers how to create one and the Node Layer window that sets its own options.
Creating a Node Layer
A graph goes onto a material in any of these ways:
- In the Node Editor, press Apply to Material... and pick a material. This adds the graph open in the editor to that material's layers as a Node Layer.
- In the Node Presets window, right-click a preset and choose Apply to Material.
- Drag a preset from the Node Presets window onto the model and drop it on the material you want.
The new layer is named after the graph and holds one channel for each channel the graph drives. Node Layers go on the materials of the Loaded Mesh, and the model needs a UV map — on a model without one the button explains that graphs on UV-less meshes come in a later version.
How a Node Layer is filled
Each Node Layer is filled per material: only the parts of the texture that belong to its material are laid out from the graph. A few things are worth knowing:
- It follows the UV channel you are viewing. The fill is laid out in the UV channel the model is drawn with. Switching the UV channel refills every Node Layer, so a brick pattern lines up with the UV map you are actually looking at.
- It fills past the UV island edges. The result is extended a little beyond each island, so texture filtering at a seam reads the fill rather than the layer beneath it and no fine seam lines appear.
- It takes no paint. Because the layer is remade from its graph whenever the graph changes, painting on it would be lost. Paint on a layer above it instead.
- Live or on demand. With Live on in the Node Editor, the graph's Node Layers refill as you edit; with it off, they refill only when you press Update.
To turn a Node Layer into ordinary, paintable pixels, use Merge Down from its right-click menu in the Layers window. Deleting a graph in the Node Editor does the same for every Node Layer using it: they keep their pixels as ordinary paint.
The Node Layer's menu
Right-click a Node Layer's row in the Layers window for three extra items above the usual layer commands:
| Item | What it does |
|---|---|
| Node Layer Settings... | Opens the Node Layer window for this layer. |
| Edit Graph | Opens the layer's graph in the Node Editor. |
| Make Unique | Gives this layer its own copy of the graph (see below). |
The Node Layer window
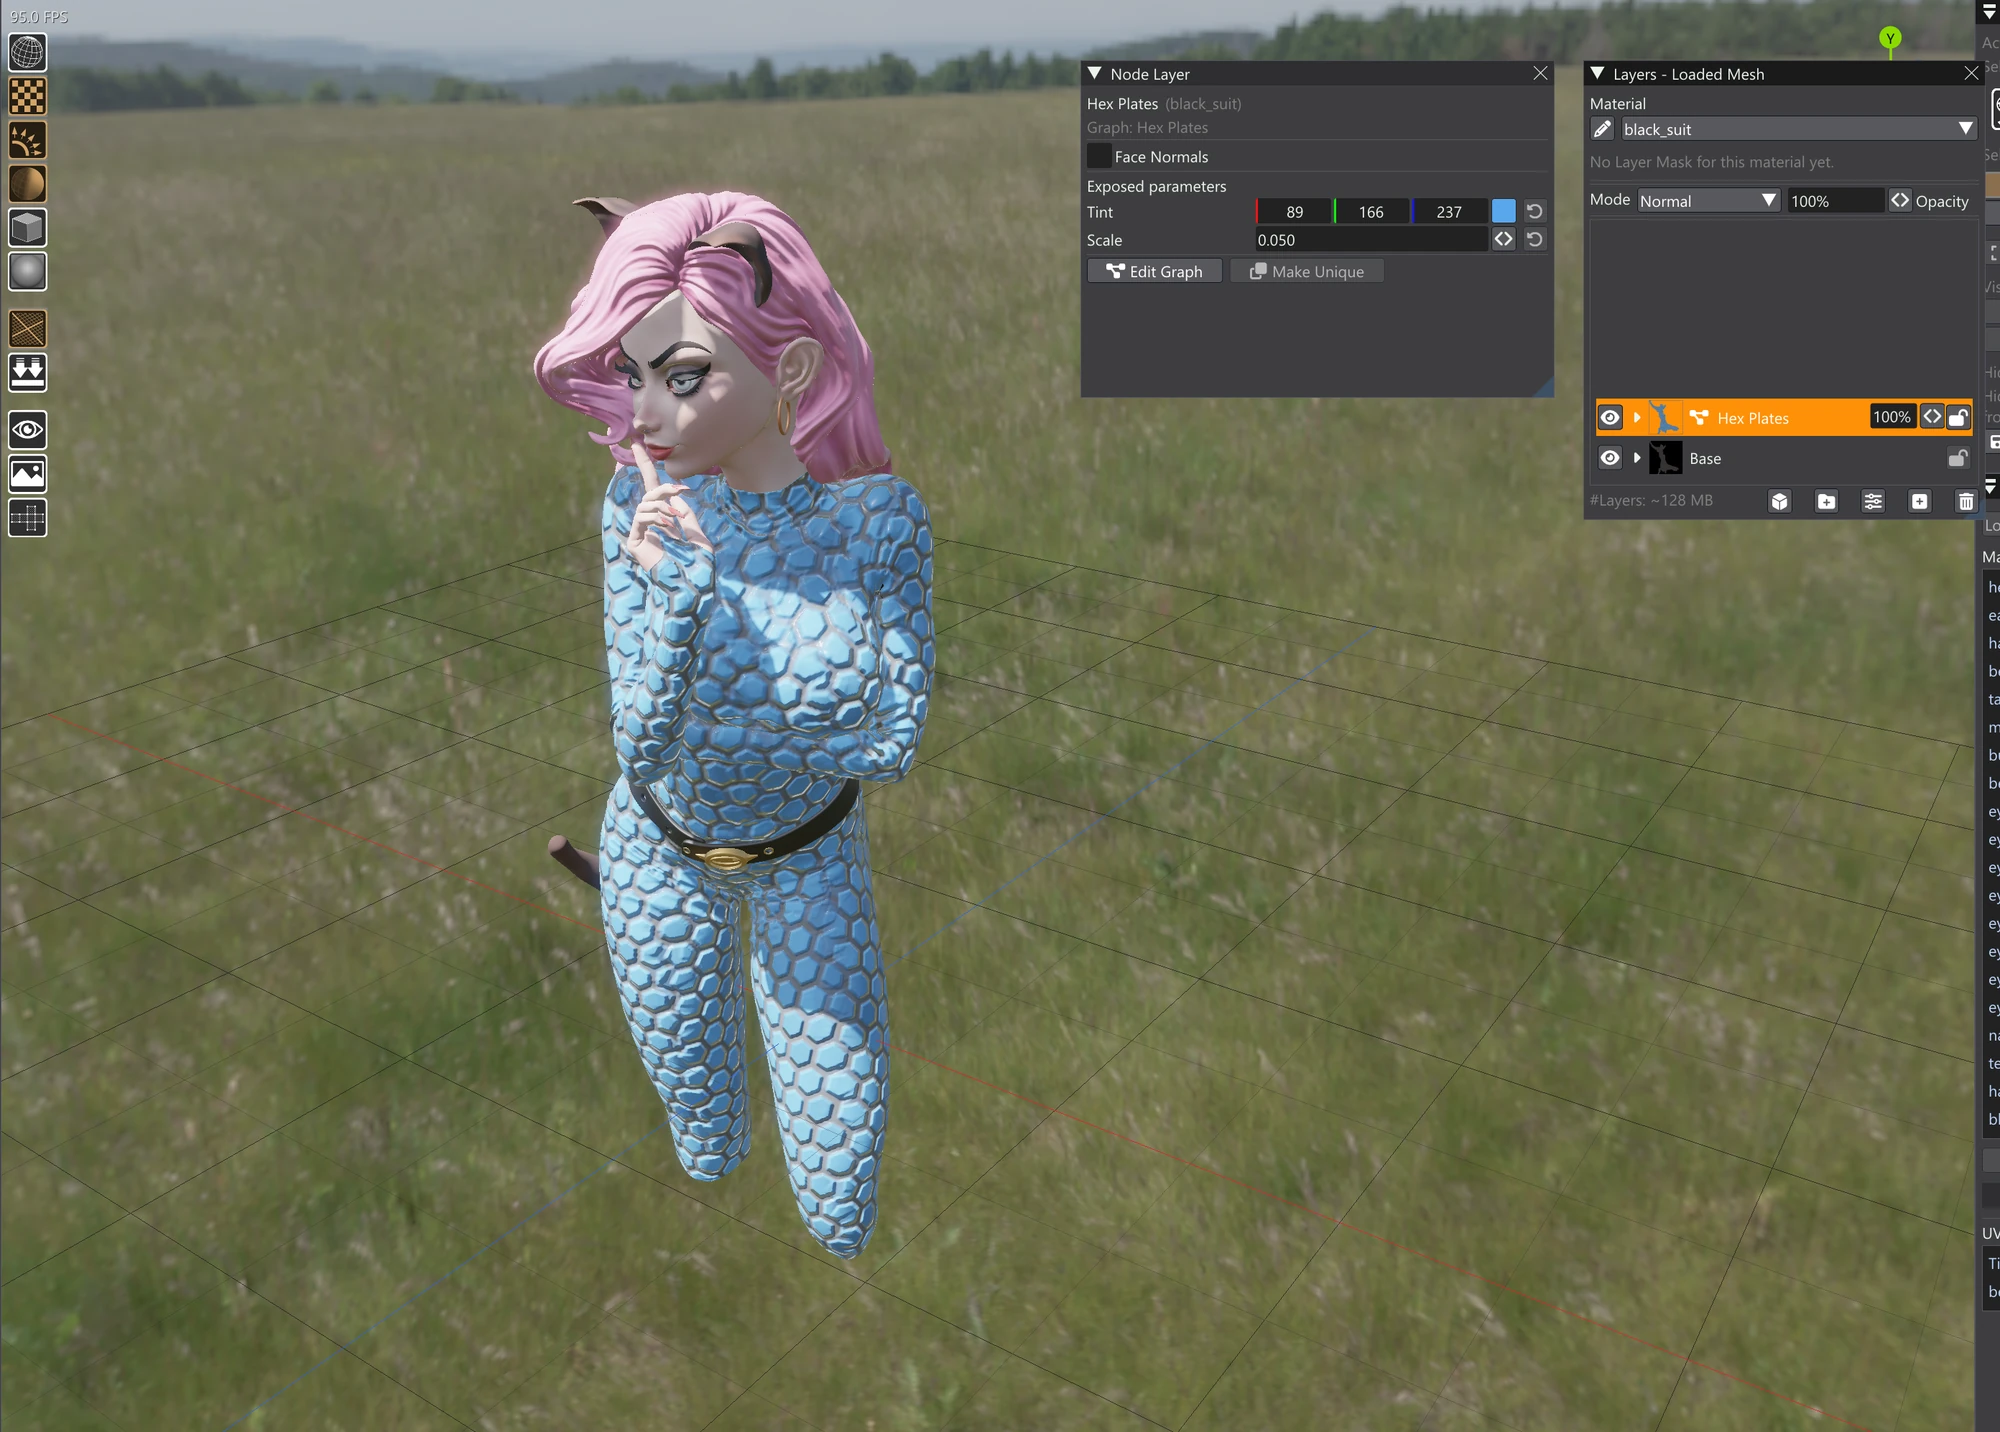
The window's heading shows the layer's name with its material in brackets, and below it Graph: followed by the name of the graph that fills it. When more than one Node Layer uses the same graph, a further line says so — for example Shared by 3 Node Layers — editing the graph refills them all.
| Control | What it does |
|---|---|
| Face Normals | Fills with each polygon's flat normal instead of the smooth normal across it. Triplanar projections then give each polygon the one side it faces most, with no blending — box mapping, crisp on hard-edged models — and every Normal the graph reads is the flat one. The layer refills as soon as you click it. |
| Exposed parameters | One row per parameter the graph exposes, with a control to give this layer its own value (see below). |
| Edit Graph | Opens the graph in the Node Editor. Every Node Layer using the graph refills when it changes. |
| Make Unique | Gives this layer a copy of the graph of its own: editing it then changes only this layer. Greyed out when the layer is the graph's only user already. |
Face Normals is set per layer, not per graph, because the same graph may want different answers on a smooth character and on a hard-edged crate.
Exposed parameters
Exposed parameters are the graph's own inputs, added in the Node Editor under Exposed parameters with no node selected (see Groups & Exposed Parameters). Each Node Layer can give them values of its own here, so one graph can produce, say, a red and a blue version of the same material on two materials without being duplicated.
- Numbers get a slider, on/off values a checkbox, colours a colour picker, and vectors three number fields. Any other kind of parameter shows (set inside the graph) and can only be changed in the graph itself.
- The button at the end of each row resets it: Back to the graph's own value. It is greyed out until the layer has a value of its own.
- While you drag a slider the layer waits; it refills once you let go, so large layers do not stall.
If the graph has no exposed parameters, the window says so and explains where to add them.