
Node Presets
The Node Presets window is the library of saved node graphs. Open it from Window → Node Presets. Each preset shows as a thumbnail tile; from here you can open a preset in the Node Editor, drop it into the graph you are building, put it straight onto a material, or save your own graphs for later.
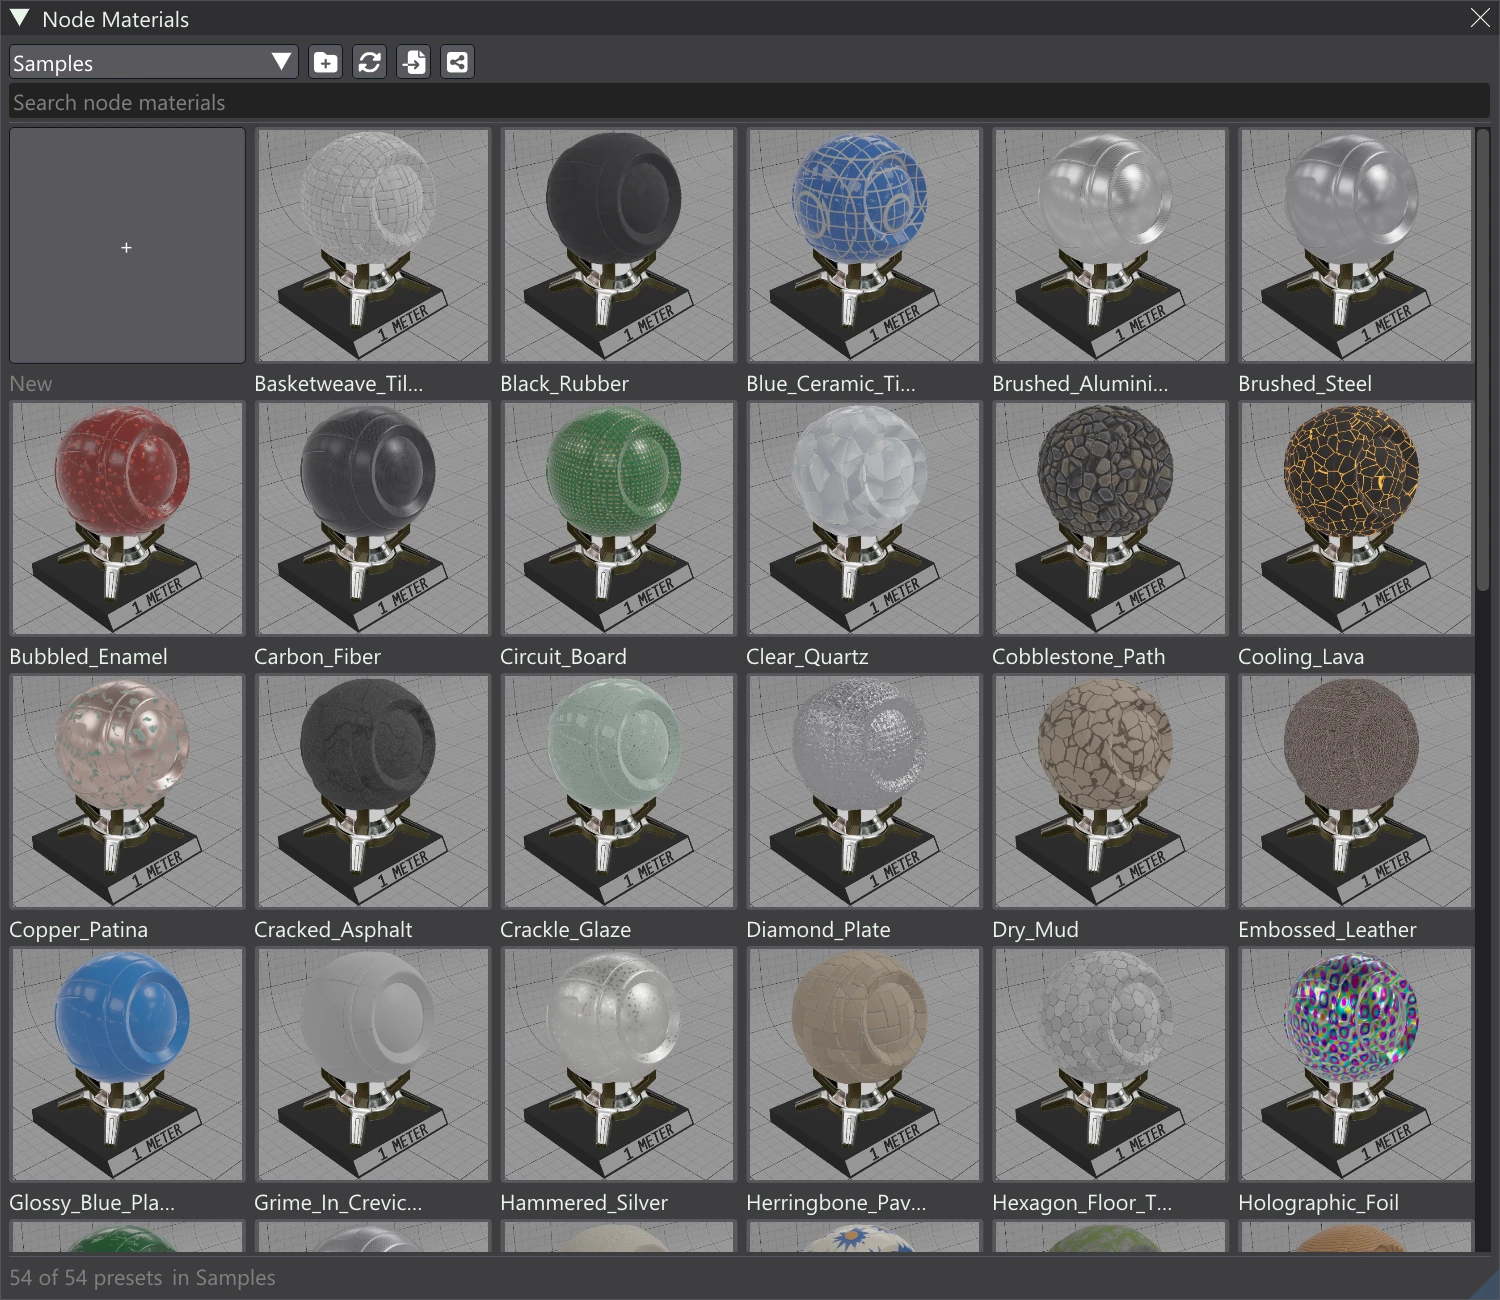
The bundled samples
Vertexix ships with 54 sample presets in the Samples folder. Pick it from the folder dropdown at the top left to browse them. They are ordinary presets: open one to see how it is built, or use it as the starting point for your own.
Browsing and finding presets
Presets live in folders, one level deep. The top row of the window picks the folder and narrows down what the grid shows.
| Control | What it does |
|---|---|
| Folder dropdown | Which preset folder to show. (top level) shows the presets that are not in any folder. |
| Folder-plus button | Creates a new preset folder and switches to it. Folder names may use letters, digits, -, _ and . — no spaces. |
| Circular-arrows button | Re-reads this folder. Use it after copying preset files into the folder outside Vertexix. |
| Search presets | Matches names, descriptions and tags. |
| All / Materials / Masks / Groups | Shows every preset, or only those of one kind. The kind is stored in each preset. |
Hover a tile to see the preset's name, description and tags with a larger thumbnail. The line below the grid counts what is showing, for example 12 of 54 presets in Samples, so you can tell at a glance how much the search and filter are hiding.
Using a preset
| Gesture | What happens |
|---|---|
| Double-click a tile | Opens a copy of the preset in the Node Editor. The preset file itself is not changed by what you do there. |
| Drag a tile onto the node canvas | Inserts the preset into the graph you are editing as a single Group node, where you drop it. This is how you reuse a saved material or mask inside a bigger graph. |
| Drag a tile onto the model | A label names the material under the cursor (Drop to apply to …); let go to apply the preset to that material, exactly as Apply to Material does. |
| Right-click a tile | Opens the preset's menu (below). |
Applying a preset to a material adds it to that material's layers as a Node Layer. It needs a loaded model that has a UV map.
The right-click menu
| Item | What it does |
|---|---|
| Open in Node Editor | The same as double-clicking the tile. |
| Open in Material Preview | Shows the preset in the Node Material Preview window, large, on the model of your choice. It does not add the preset to your project, and the Node Editor does not need to be open. To go back to the graph on the Node Editor's canvas, click Show the Node Editor's Graph in the window's sidebar. Changing that graph's material, or switching graphs, also goes back. |
| Apply to Material | Pick a material of the loaded model; the preset is added to it as a Node Layer. |
| Use as Graph Brush | Switches to the Paint tab with the Brush tool, painting with a copy of the preset's graph instead of a flat colour. Set the brush's Source back to Colour to turn it off. |
| Rename Preset... | Gives the preset a new name. Names follow the same rules as folder names, and two presets in one folder cannot share a name. |
| Move Preset... | Moves the preset to another folder or to the top level. |
| Duplicate | Makes a copy beside it, with a number added to the name. |
| Delete Preset... | Deletes the preset file after asking. Materials already using it keep their copy. |
| Show in Explorer | Opens the preset's folder in Windows Explorer. |
Delete Preset... removes the preset file from disk. It is not undone with Ctrl+Z.
Saving your own presets
The first tile in the grid is always the + tile. With a graph open in the Node Editor it reads Save and saves that graph as a preset; with no graph open it reads New and starts a new graph in the Node Editor instead.
You can also save just part of a graph: in the Node Editor, right-click a single Group node and choose Save Group as Preset.... The same save dialog opens, titled Save group as preset.
| Field | What it does |
|---|---|
| Name | The preset's name. It starts as the graph's name, with spaces turned into underscores — preset names follow folder-name rules. |
| Folder | Where the preset is saved: (top level) or one of the preset folders. It starts on the folder you are browsing. |
| Description (optional) | Shown when hovering the tile, and searched by the search box. |
| Tags, comma separated (optional) | Keywords for the search box, such as metal, worn. |
After saving, the window switches to the folder you saved into so the new tile is in view.
Replacing a preset
If a preset with that name is already in the chosen folder, the dialog says so and the Save button becomes Replace.... Press it once and it changes to Replace it; press again to overwrite the old preset. Changing the name or folder cancels the confirmation.