
Node Texturing
Node texturing builds a material out of nodes instead of brush strokes. A node graph computes texture channels — colour, roughness, metallic, normal, emission and so on — and you put it to work as a Node Layer: an ordinary layer in a material's layer stack, sitting alongside your painted layers, whose pixels are filled from the graph. Change the graph and the layer is filled again. Open the editor from Window → Node Editor.
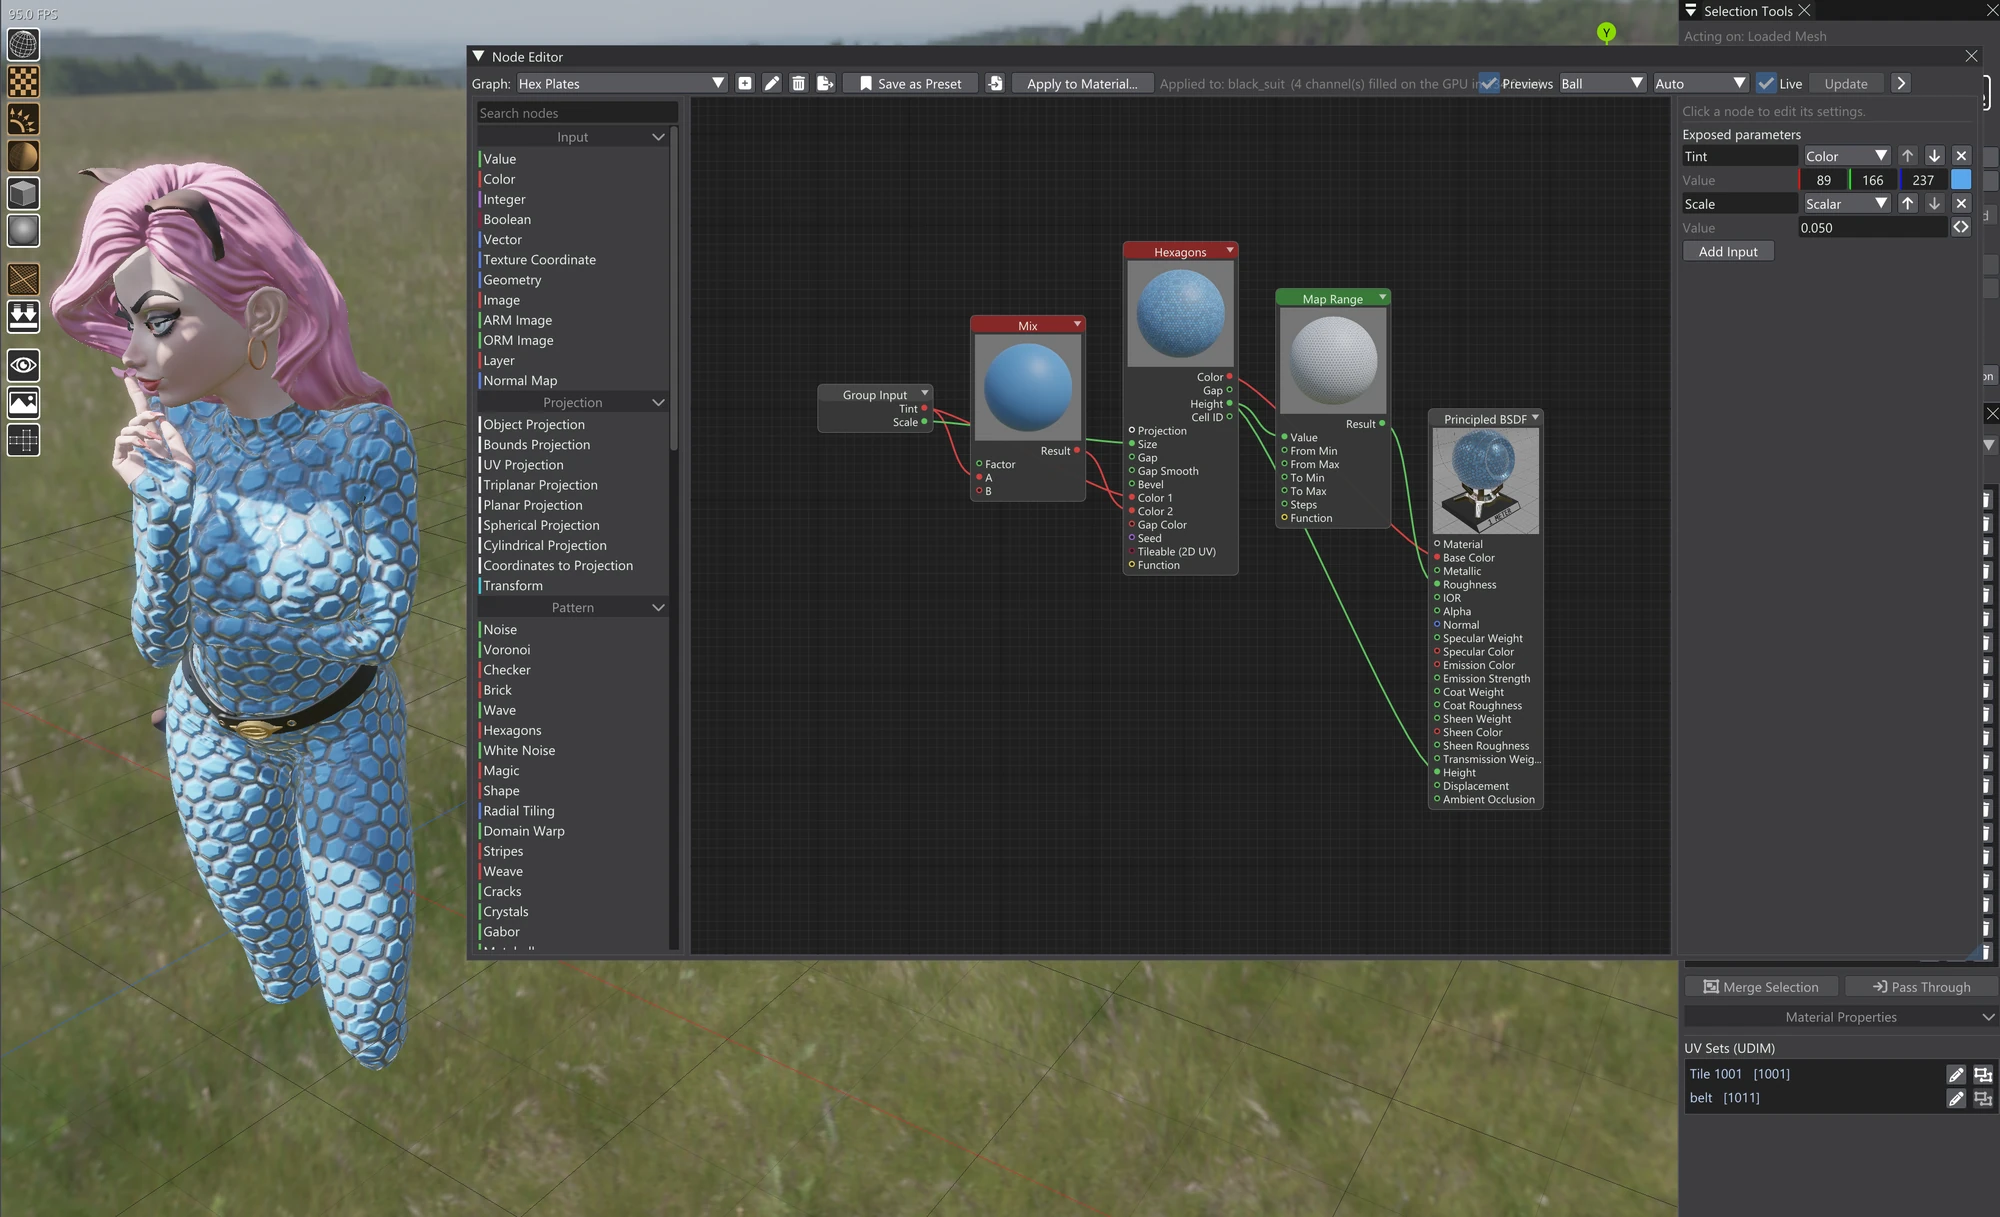
What a node graph is
A graph is a set of nodes joined by links. Each node does one job — produce a pattern, project it onto the model, adjust a colour, do some maths — and passes its result along a link to the next. A new graph starts with a Principled BSDF output, the node whose inputs become the material's channels; everything you build feeds into it. Because the result is computed rather than painted, you can change a scale, a colour or a seed at any time and every texel follows.
Graphs belong to the project and are saved with it. Each one can also be exported on its own as a .vxn
file, with any images it uses travelling inside it, so a material you build once can be reused on
other models. Vertexix ships with a folder of sample presets to start from.
The windows involved
| Window | What it is for |
|---|---|
| Node Editor | Build and edit graphs: the node list on the left, the canvas in the middle, the settings of the selected node on the right. Open it from Window → Node Editor. |
| Node Presets | Browse saved graphs as thumbnails. Double-click one to open it in the Node Editor, or drag it onto the node canvas to insert it as a group. Open it from Window → Node Presets. |
| Node Layer | The settings of one Node Layer: which graph fills it, Face Normals, and its own values for the graph's exposed parameters. Open it by right-clicking a Node Layer in the Layers window and choosing Node Layer Settings.... |
A typical workflow
- Start a graph. Double-click a preset in Node Presets, or press the + button beside Graph: in the Node Editor for a new graph with a Principled BSDF output.
- Build and preview. Add nodes, link them, and watch each node's preview as you change its settings.
- Add it to a material. Press Apply to Material... and pick a material. Vertexix adds a new layer to that material's stack, named after the graph, covering each channel the graph drives, and fills it. The model needs a UV map for this.
- Tweak. With Live on, every edit refills the graph's Node Layers as you work; with it off, press Update when you are ready. Exposed parameters let each Node Layer give the graph its own values from the Node Layer window, without touching the graph itself.
One graph can fill several Node Layers. Editing it refills them all; if one layer should go its own way, choose Make Unique to give it a copy of the graph of its own.
In this section
- Node Editor — the canvas, adding and linking nodes, previews, saving and loading graphs.
- Node Presets — browsing, opening and saving presets.
- Node Layers — graphs inside a material's layer stack.
- Groups & Exposed Parameters — packing nodes into groups and exposing values per layer.
- Material Nodes — nodes that carry a whole material.
- Mesh-Aware Nodes — nodes that read the model's shape.
- Node Reference — every node, by category.