
Icon Toolbar
A column of icons sits at the left edge of the viewport, just under the frame-rate readout. Each one turns on or off exactly what its icon shows. Hover any of them in the app for a tooltip. A lit icon (gold border) is on. A dimmed one has nothing to show yet. Turn the mouse wheel over the column to make the icons bigger or smaller.
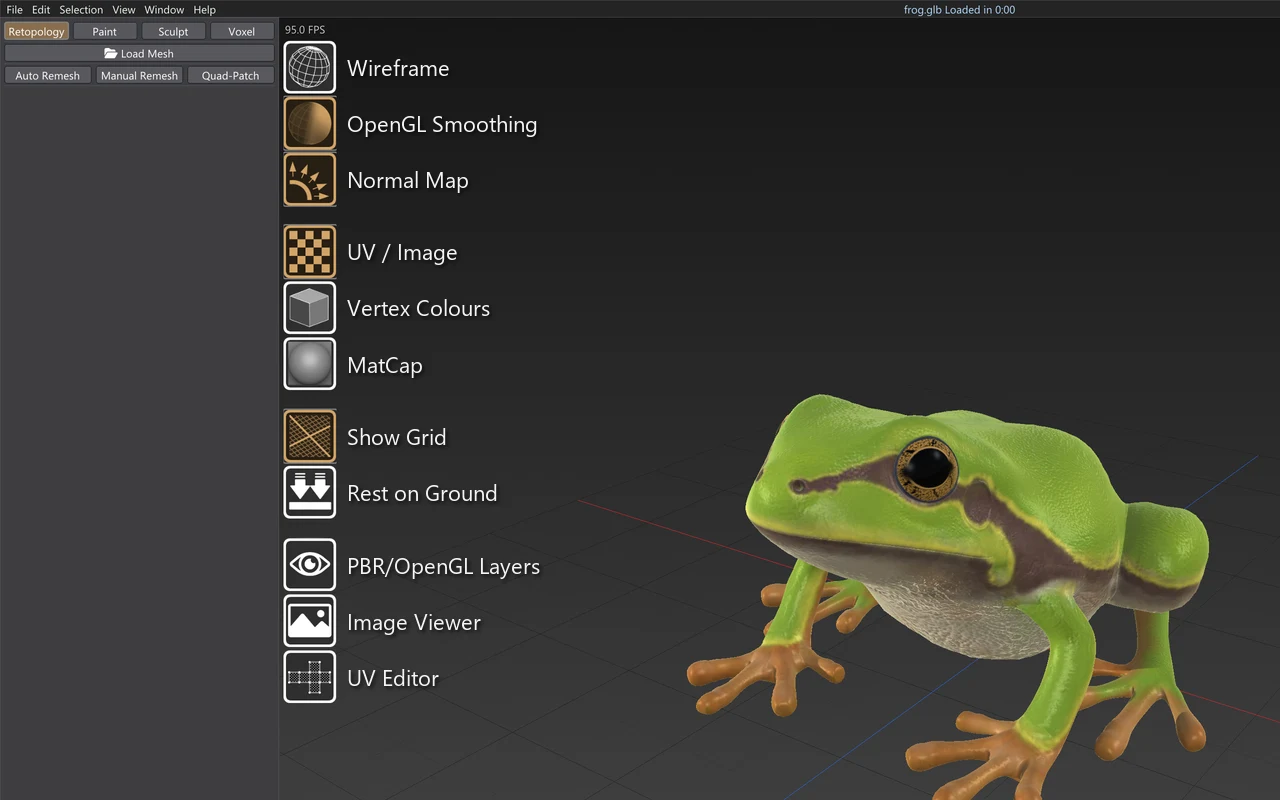
Shading
- Wireframe — overlays polygon-border wireframe on top of whatever's shown.
- OpenGL Smoothing — smooth (Phong) shading across faces. Off shows flat, per-face shading.
- Normal Map — applies the baked or imported normal map to the shading. Dimmed until there is one.
Surface colour
- UV / Image — shows the selected image as the surface's unlit albedo. Dimmed until a UV map exists.
- Vertex Colours — shows what is painted on the points: colour and the PBR channels. On the Loaded Mesh, that is the model's own per-vertex colour, dimmed if it has none. The Generated Mesh can always show it.
- MatCap — lights the surface from a fixed MatCap image instead of the normal shading. Caps Lock also toggles it (see Settings > Interface).
While a PBR/OpenGL layer is being viewed, clicking UV / Image, Vertex Colours or MatCap leaves the layer view and turns that view on.
Scene & ground placement
- Show Grid — draws a floor grid on the X,Z plane (X in red, Z in blue).
- Rest on Ground — a one-shot action: moves the mesh so its lowest point sits at Y=0 and recenters the view. Click again to move it back.
Panels & windows
- PBR/OpenGL Layers — shows a row of buttons along the bottom of the viewport, each one isolating a single channel.
- Image Viewer — opens the Image Viewer panel.
- UV Editor — opens the UV Editor.
A file with an animation clip adds an Animation icon under the UV Editor. In Paint and Sculpt, the current mode's tools follow further down the column.