
Unwrap and Reshape
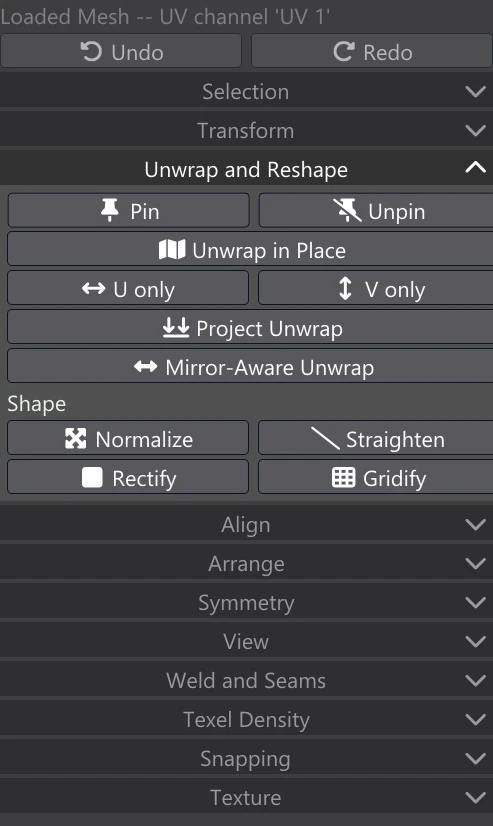
The Unwrap and Reshape accordion flattens parts of the layout again from the model's 3D shape, and reshapes islands into lines, rectangles and grids. Where the other tools move islands whole, these work out every UV of an island afresh, so they are the ones to reach for when an island is stretched, twisted or folded. Editing tools are for Regular and up; in Free and Light the buttons are disabled and their tooltip says why.
How these tools behave
Every tool here needs a selection; with nothing selected, a button's tooltip says Select something first. Each one runs once on the selection, then its settings appear in the Adjust box at the bottom of the column, where you can change them and have the tool run again as one undo step. The unwraps and the Shape tools (again all but Normalize) start from the settings you last gave it in the Adjust box, for the rest of the session.
- They run in the background. The unwraps and the Shape tools (all but Normalize) can take a few seconds on a large selection, so they work while the window keeps drawing. Under the Undo and Redo buttons the column shows the tool's name with solving..., a progress bar and a Cancel button. Cancel stops the tool and nothing changes (if you were adjusting, the layout goes back to how it was before the tool first ran). While a tool is solving, other edits wait: A UV solve is running: wait for it, or cancel it. If the layout changes underneath it, the result is dropped rather than put on the wrong layout.
- An island is reshaped whole, or left exactly as it was. The tools never fold a face over another. If an island's new shape would fold, or crush a face flat, that island is left untouched and the status line says so (The shape would fold the selection over itself: it was left as it was.). The other islands of the selection are still done.
- The texture follows. As with every UV edit, the texels under each island move with it, so baked and painted textures stay on the model. See Texture.
- Pins hold. Pinned UVs stay where they are through these tools (each tool's Keep pins setting, where it has one).
Pin and Unpin
| Control | What it does |
|---|---|
| Pin (P) | Pin the selected UVs. In the face modes, the selected faces' corners are pinned. Pinned UVs are drawn on the canvas as red dots and hold where they are through Unwrap in Place, Relax and the Shape tools. |
| Unpin (Alt+P) | Unpin the selected UVs. |
| N pinned | Shown under the buttons once anything is pinned: how many UVs of this map are pinned. |
Pinning and unpinning are undo steps of their own. Pins are saved with the project, for the Generated Mesh's UV map and for each of the Loaded Mesh's UV channels.
Pins also survive Generate UV Map. When you make a new UV map for a material, each pinned UV is pinned again in the new map at exactly the place it had, and every new island holding two or more pins is flattened around them (an island with one pin is simply moved onto it). Pins are kept exactly, even when that costs the island its shape: if pins that lay on separate islands end up on one island of the new map, that island is bent to meet them all.
Pin two or more UVs of an island that already sits where you want it — the ends of a strip, the corners of a panel — then Unwrap in Place: the island is flattened again between them instead of being fitted back by size and angle.
Unwrap in Place
Flattens the selected faces again from their 3D shape, with as little stretch as can be, then lays the result back where they were, at the same size and angle. Use it to repair one stretched or twisted island without re-making the whole UV map, or after moving UVs by hand.
Each connected group of selected faces is solved on its own: first a solve that keeps angles, then a number of stretch-reducing steps. If an island holds two or more pins, the pins hold it in place instead of the fit; with one pin, the fit is shifted so that pin stays put. An island the unwrap would fold keeps its layout.
U only and V only are Unwrap in Place where only one coordinate of each UV changes: U only takes just the U from the unwrap and keeps every V; V only the other way round. Use them to even out stretch along a strip without moving it sideways.
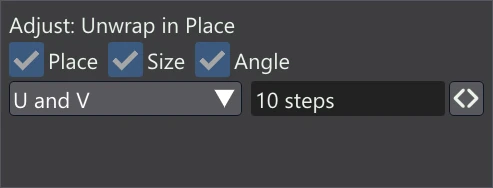
| Setting | What it does |
|---|---|
| Place | On: the island stays centred where it was. Off: it is centred on the 2D cursor (Shift+right-click on the canvas). |
| Size | On: the island keeps its size. Off: it gets the layout's average texel density. |
| Angle | On: the island keeps its turn. Off: it is turned square to its tightest box, at the quarter turn nearest to how it lay. |
| U and V / U only / V only | Which coordinates come from the unwrap. The U only and V only buttons are this setting. |
| N steps | Stretch-reducing steps after the first, angle-keeping solve (0 to 100). 0 gives the angle-keeping solve alone; more steps even out sizes across the island. |
Project Unwrap
Flattens the selected faces straight along their average facing, like a slide projector, and lays them back where they were. It suits flat panels, decals and labels, where a straight projection keeps a printed design undistorted. Pinned UVs snap back to their places afterwards.
A projection only works on faces that face roughly the same way: a group with a face turned more than 80° away from the projection direction is too curved to project and is left as it was.
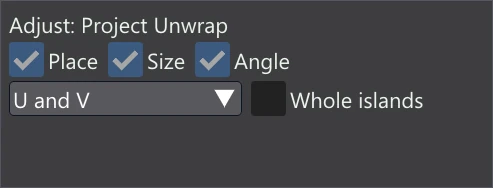
| Setting | What it does |
|---|---|
| Place, Size, Angle | What is kept from before, as for Unwrap in Place. |
| U and V / U only / V only | Which coordinates come from the projection; the other is kept. |
| Whole islands | On: each island the selection touches is projected, all of it. Off: the selected faces alone. |
Mirror-Aware Unwrap
Unwraps the selection together with its mirror image on the other side of the model. Use it on symmetric models, so that left and right come out exactly alike.
- A pair of islands (this one and its mirror image on the other side): the other island is laid out as this one's reflection — the same shape and size exactly — turned onto where it already lies. This happens only when the mirror image is a whole island of its own with the same number of faces and every point matched, so an island is never torn.
- An island across the middle (one that is symmetric in itself, such as a torso): it is unwrapped and made symmetric about a line in UV.
- No mirror image: the island is simply unwrapped by itself, as Unwrap in Place would.
The mirror images are found by the 3D points, so the two sides need not be triangulated alike.
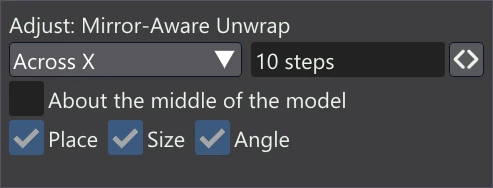
| Setting | What it does |
|---|---|
| Across X / Y / Z | The plane the model is mirrored across. Across X (left and right) is the usual one. |
| N steps | Stretch-reducing steps after the first solve, as for Unwrap in Place. |
| About the middle of the model | On: the mirror plane runs through the middle of the model's bounds. Off: through 0, the model's own origin. Turn it on for a model that is not centred on its origin. |
| Place, Size, Angle | Kept from before, as in Unwrap in Place, for the selected side. Its mirror image keeps its own place. |
Shape
The Shape row places some UVs exactly — along a line, on a rectangle, on a grid — and then, by default, solves the rest of each island around them so it follows without folding. Pinned UVs are never moved while Keep pins is on. Circle and Offset Border, which work the same way, are in the Arrange accordion.
Normalize
Scales the selection to fill its tile: the selection is stretched so its bounds cover the whole 0–1 square of the UDIM tile it is in. Use it to make one island, or a set, use all of a texture.
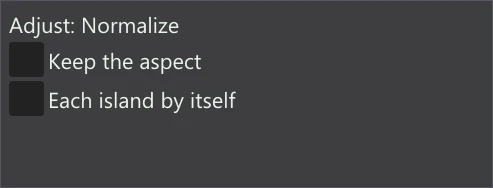
| Setting | What it does |
|---|---|
| Keep the aspect | Scale evenly, so the shape is not stretched to the tile's square: the longer side fills the tile. |
| Each island by itself | Every island fills its tile by itself. Off: the selection as a whole does. |
Straighten
Select a run of edges in Vertex or Edge mode and press Straighten: the run becomes a straight line between its two ends, and the rest of its island follows. Use it on the edge of a strip, a sleeve's cuff or a belt so the texture runs straight along it. Each separate run in the selection is straightened by itself. Without a run of edges selected, it says Select a run of edges first (Vertex or Edge mode).
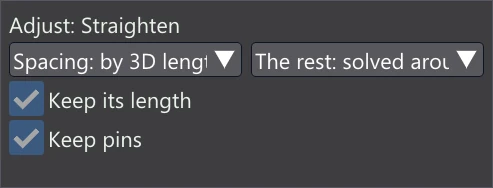
| Setting | What it does |
|---|---|
| Spacing | by 3D length: each UV as far along the line as its point is along the 3D edges. even: equal steps. as it lies: as far along as it is now. |
| The rest | solved around it: the rest of the island is flattened again with the placed UVs held, so it follows them without folding. left as it is: only the placed UVs move. |
| Keep its length | On: the line is as long as the run of edges was. Off: it runs from one end to the other. |
| Keep pins | Pinned UVs are not moved. |
Rectify
Makes each selected island's border a rectangle, with its inside flattened to fit. Use it on panels, screens and labels that should map to a clean rectangle of texture. The corners are four border UVs you select (Vertex mode); otherwise Rectify picks, from the border's sharpest turns, the four that make the best rectangle. In Vertex and Edge modes, it works on the islands of the selection. A border needs at least four UVs: No border here to make a rectangle of: it needs one loop of at least four UVs.
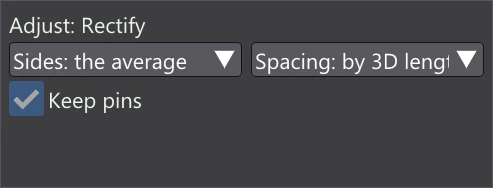
| Setting | What it does |
|---|---|
| Sides | How long each side of the rectangle is: the average of the two opposite sides of the border, or the longer of them. |
| Spacing | How the border UVs are spaced along each side: by 3D length, even, or as they lie (as for Straighten). |
| Keep pins | Pinned UVs are not moved. |
Gridify
Lays the selected quads on a grid of rows and columns, square to U and V — for straight texture strips on cylinders, belts and trims. The grid is walked out from the largest quad and laid back over the selection without turning it, at the selection's size. A quad that does not fit the grid (where the mesh's quad layout turns) stays off it, and faces that are not on the grid are solved around it.
Gridify needs quads. On a selection made only of triangles there is nothing to lay on a grid: it refuses with No quads in the selection to lay on a grid. and changes nothing.
Its Adjust box has these settings:
| Setting | What it does |
|---|---|
| 3D sizes | 0 to 1. At 1, each column and row is as wide as its edges are long in 3D; at 0, all columns and rows are the same size. |
| Blend | How far onto the grid the UVs go: 1 all the way. |
| The rest | solved around it or left as it is, as for Straighten. |
| Keep pins | Pinned UVs are not moved. |