
Editing Quads
The Edit and Join tools change the quads you have — the ones made this session and, when there was a Generated Mesh already, its quads too. Every change is one step of the session's undo.
Picking points, edges and quads
Only quads facing you, and not hidden behind the model, can be picked; turn on X-Ray to reach the back. The point or edge under the cursor is drawn in cyan; picked points are large yellow dots, picked edges yellow lines and picked quads a yellow tint.
Move Brush and Relax Brush
Both show a crosshair whose circle is the brush's reach. [ / ] change its size, Shift+[ / ] its strength (the sliders under the tools show both). Points facing away or hidden are left alone unless X-Ray is on, and every point stays on the model's surface. One stroke is one undo step.
- Move Brush: drag to slide the points under the brush with the cursor, softly at the edge of its reach.
- Relax Brush: drag (or just press) to even out the spacing. Points on an open edge slide along that edge, and its corners stay put.
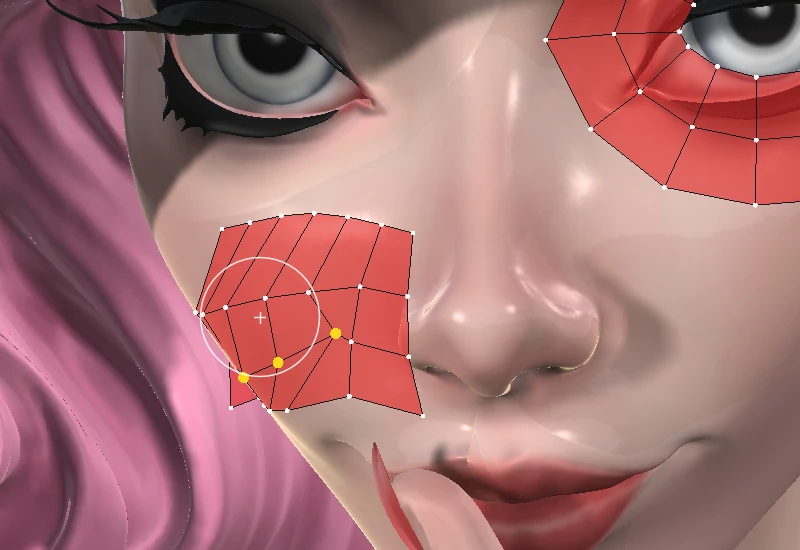
Edit
Pick Points (1) or Edges (2), with the radio buttons under the tools or the keys. Click to pick, Shift+click to add or remove. Drag a picked point or edge to slide the selection over the model: one point follows the cursor exactly; several move together. Bring the point you are dragging within about 6 pixels of another point and it snaps exactly onto it (ringed green while you drag); the others move with it. Double-click a quad to pick every quad joined to it.
Slide a point along an edge line: hold Shift, press on a point and drag. The way you first move the mouse picks the line — the point's edge most in that direction, and the edge straight across the point from it — and from then on the point moves only along that line, either way (lit cyan), staying on the model and stopping just short of the next points. Where nothing continues the line (a rung meeting the outline) it slides along its one edge only. In Mirror Mode the mirrored point slides too. One undo step. A Shift+click that does not move still adds or removes the point.
Picking many at once: Shift+click a point, an edge or a quad, then keep Shift held and simply run the mouse over more of the same kind — each one it passes over is picked too, no clicking needed. Running back over a picked one leaves it picked; let go of Shift to stop. One Ctrl+Z takes the whole run back. This works with no tool, with Edit (points or edges) and Delete Quads.
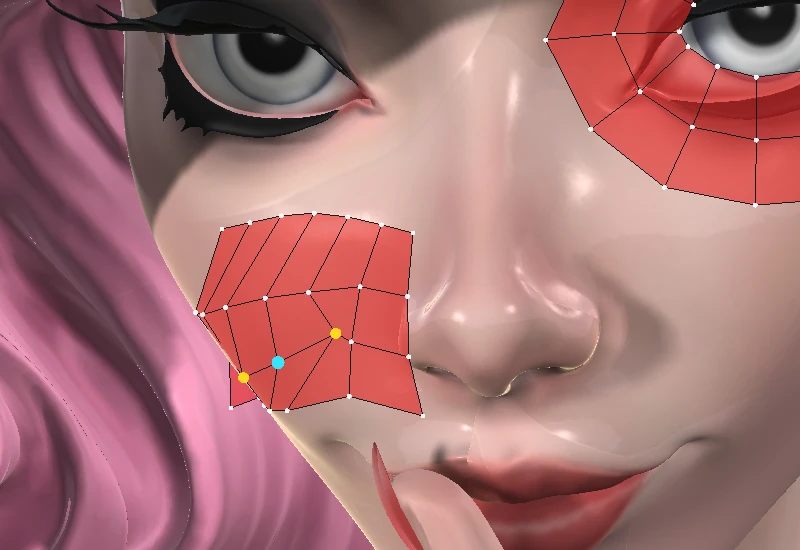
Loop
Click a quad, then a neighbouring one: the whole face loop through both is picked (also L with two neighbouring quads picked). Alt+click an edge picks its edge loop. Shift adds to what is picked. Picked quads can be recoloured with Apply Colour or removed with Delete.
The L key does the same for edges and points, in any tool that picks them: pick two edges in a row (they share a point and run on in the same line) or two neighbouring points, press L, and every edge or point in that line is picked. Inside the quads the line runs straight on through each crossing; along the edge of a patch it follows the edge to the patch's corners. With Bridge and Connect it fills in the side being picked (green, or blue after Tab), so a long side takes two clicks and L. Ctrl+Z takes it back. The key can be changed in Settings > Keyboard Setting, under Quad-Patcher.
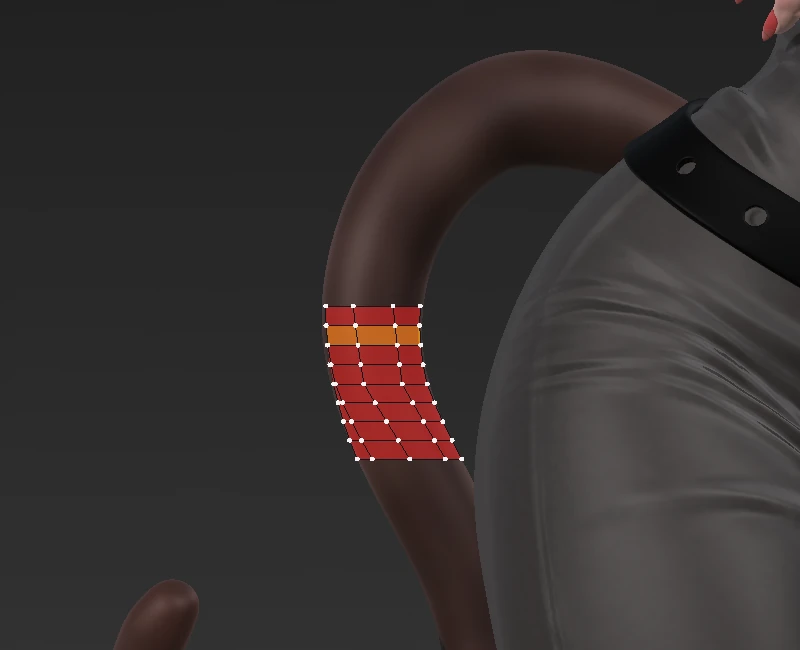
Split Loop
Hover an edge: a new edge loop is previewed across every quad of its ring, exactly where it will be cut. Where the cursor is along the hovered edge sets where the cut falls. Click to make it; the new points are put on the model.
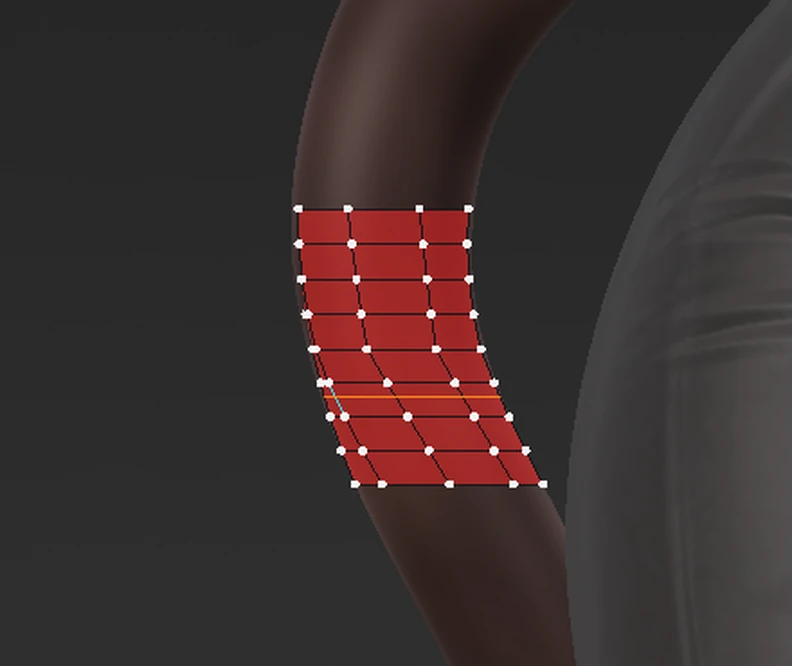
Extend (Edit)
Slides an open edge outward without adding any quads, stretching the last row — to tidy a border that falls short of where it should end. Pick the open edges as for Create > Extend (click, Shift, Alt for the whole run), then press on the model and drag: the edge moves out (or back in) with the drag. Enter clears the picked edges.
Fill
Click the open loop round a hole (an even number of edges) to fill it with quads lying on the surface. Up / Down add inset rings, Left / Right turn the grid, and Enter makes it, as with Cap.
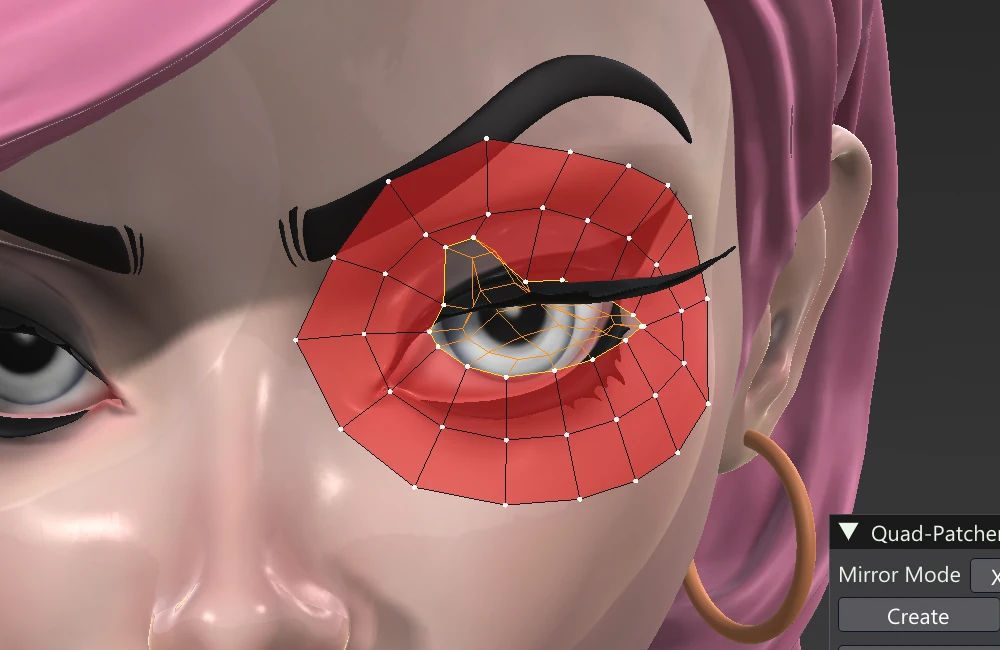
Delete Quads
The quick way to clear quads away. With Delete Quads lit, the quad under the mouse turns red: click it and it is gone at once. Hold the button and drag, and every quad the mouse passes over is deleted — the whole drag is one undo step. Shift+click picks quads instead (they turn yellow) — keep Shift held and run the mouse over more to pick them too — and Delete removes them. Quads already picked when you choose the tool are deleted straight away. Mirror Mode deletes the mirrored quads too.
Align
Lines up the points between two points you pick. Click a start point (ringed green), then an end point (ringed red). The points between them are the ones along an edge line through both, or, when no line joins them, the shortest way along the edges; the run is drawn in cyan, with an orange dot where each point will go.
Points you have already picked count too: pick two points (for example Shift+click in plain edit mode) and choose Align, and they are the start and the end. Pick a whole run of points along an edge — the L key's edge line, or a Shift sweep — and its two ends are the start and end, and exactly those points are lined up. Clicking inside Align picks the points too, so the two always agree. Choose how in the tool's settings:
- Align: the points are put on the straight line from the start to the end, each keeping its place along it.
- Align Spacing: the same, and the points are spread evenly between the start and the end.
- Space Evenly: the run keeps its curve; only the spacing is evened out along it.
- Arc: the points go onto the circular arc through the start, the middle of the run and the end — a clean curve in place of a wobbly one.
- Smooth: the run's own curve, smoothed — its shape kept, its wobble taken out.
| Setting | What it does |
|---|---|
| Axis | Align and Align Spacing only. Free runs the line from the start to the end. X, Y, Z, View across or View up runs it from the start along that direction, and the end moves onto it too. A run that hardly follows the axis is refused (its points would fold up onto the start). |
| Strength | How far the points go: 100% all the way, less for a gentle tidy. Ctrl+mouse wheel changes it while a run is picked, and the orange dots follow, so you can see the result before applying it. |
| Rows either side | Also aligns the runs parallel to the picked one, this many quads out on each side, each between its own ends — a whole strip at once. A row stops where the quads do (an outline, a triangle). |
The quads stay on the surface. A straight line is laid along the model as a straight slice through the start, the end and the surface, so it follows the curvature rather than cutting under it, and every point is cast onto the model along its surface normal. Before anything moves, every quad touching a moved point is checked; if the full move would sink one into the surface (a straight line across a fold or a tight bend can), the move is held back to the most that keeps every quad on the surface, and the status line says by how much. If no move at all is safe, nothing moves — Space Evenly and Smooth, which keep the run's own curve, usually can.
Apply (or Enter) moves the points, kept on the model; the start and end stay picked, so you can try another way and apply again. Click another point to start a new run. In Mirror Mode the mirrored points move too. One undo step.
Delete and Apply Colour
In the Edit tab, Delete (or Delete / Backspace) removes the picked quads and any points left unused. With edges picked instead, it removes the quads on them.
With points picked, it deletes the points and keeps the lines — for clearing up the points left over on an outline, for example after quads have been joined into an n-gon:
- A point on a line (two visible edges meet at it) goes, and the line runs straight from the point before it to the point after. The edges hidden inside a merged polygon do not count. A quad that used the point as a corner becomes the triangle of its other three corners; a merged polygon keeps its shape, less the point.
- A point where three or more visible edges meet is a real junction and is kept; the status line says so. Use Join or Weld for those.
In Mirror Mode the mirrored points go too. One undo step. Apply Colour moves the picked quads to the current Group colour.
Join (Alt+Z)
Pick two or more polygons that touch along their edges and press Alt+Z (from any tool; the key can be changed in Settings > Keyboard, under Quad-Patcher), or the Join Faces button in the Join accordion: they become one polygon along their outline, in the first one's group colour, and it is left picked. Points along the outline that no other quad uses and that lie on a straight run drop out. If what is left has three or four corners it becomes a real triangle or quad: two triangles join into a quad, as does a patch of quads with nothing attached along its sides.
More corners make an n-gon (a merged polygon). The polygons are not rebuilt: they stay quads underneath, so every tool still works on them, but from then on they are one polygon:
- its inside edges and points are not drawn, in the Quad-Patcher or on the Generated Mesh's wireframe;
- picking any part of it picks all of it, and dragging moves it whole; Shift+click takes it off whole;
- it stays merged through Finish, Save Session and saving the project;
- Export Mesh writes it as one n-gon (in formats that keep polygons, such as OBJ and FBX). With a UV map, an n-gon cut by a UV seam, or spanning two materials, goes out as its quads.
Rework it later in quads the usual way, for example delete it and fill the hole with Patch, Guided Fill or Cap. Joining a merged polygon with more polygons makes one larger merged polygon. The join is refused only when the polygons do not touch along their edges, or would leave a hole in the middle. In Mirror Mode the mirrored polygons are joined too. One undo step.
Create UV from Selection
UV-map the quads as you go, a piece at a time. Pick the quads in the Quad-Patcher (click them with no tool or the Edit tool, Shift adds; picked points or edges count as the quads they wholly cover — not the Selection Tools panel, which picks the Loaded Mesh), choose how to unwrap them in the dropdown beside the button, and press Create UV from Selection. Pressed with nothing picked, it says so in the status line:
- Straight grid: every quad a rectangle, the rows and columns straight — for strips, rings and patches you made as grids.
- Smooth: the low-stretch unwrap Generate UV Map uses, for shapes that are not grids. It may cut the quads into several islands.
- Shape: the quads laid out as they look. Each connected piece is unfolded whole, with no seam cut, at its true proportions, and turned as you see it from the front of the piece (the model's up kept up): a loop round an eye stays a ring, a patch keeps its outline. A piece that cannot lie flat whole — a closed shell — is unwrapped Smooth instead, and the status line says so.
What you have made so far goes into the Generated Mesh first, as if you pressed Finish (Edit > Undo takes it back), and the Quad-Patcher stays open on it. The selected quads are unwrapped and the UV Editor opens to show them.
The sends have a UV map of their own, Quad-Patcher UV: the first send makes it, beside the model's maps (UV 1 and any others), which are left exactly as they were. It becomes the active UV map, so the UV Editor shows only what you have sent. Every later send is added to it, beside the islands already there, at their texel density and without overlapping them; when it is full, everything is shrunk together to make room. Sending a quad again replaces its old UVs. To go back to the model's own map, pick it in the UV Editor's UV map dropdown, or the UV map dropdown at the bottom of the sidebar (both list the UV maps while the Quad-Patcher is open). Rename or delete Quad-Patcher UV like any other (the next send makes a new one if it is gone). While Quad-Patcher UV is the active map, Generate UV Map unwraps into it, replacing the sends. Selecting faces in the UV Editor selects their quads on the model (Sync with 3D).
- Continuing a layout. Quads that touch quads already sent — sharing two or more points with them — are not made a new island: they are unfolded from those points, which keep their UVs, so the new quads carry straight on from the old ones, the same way round and at the same density, joined into one island. Build a strip a section at a time and its UVs grow with it.
- Mirror Mode. With Mirror Mode on, the mirror images of the quads you picked are sent too, and the layout is symmetric: only one side is unwrapped, the other side is its reflection, and the mirror line is the middle of the map (U = 0.5), where the two halves meet as one island. With more than one mirror axis on, the first (X, then Y, then Z) is the one the map is symmetric about.
Quads that have UVs in Quad-Patcher UV are marked in the viewport, as the Sent quads setting under Quad Opacity says (it also shows how many there are; at 0 its buttons have nothing to show yet). If the model itself is shown with the UV checker, pick Colour so the sent quads stand out: Image draws the image picked in the Image View through their UVs — the UV checker, so stretching shows at once, Grey, or a texture — and changes as soon as another is picked there; Colour draws them in a light blue no group uses. Moving or reshaping a sent quad takes its mark away, and its UVs with it at the next Finish.
Connect (Join)
The quick bridge: pick the first edges (green), then the second ones (Tab or a click on another run, blue). As soon as the two have the same number of edges, one row of quads joins them — no counts, no Enter. For more than one row use Bridge.
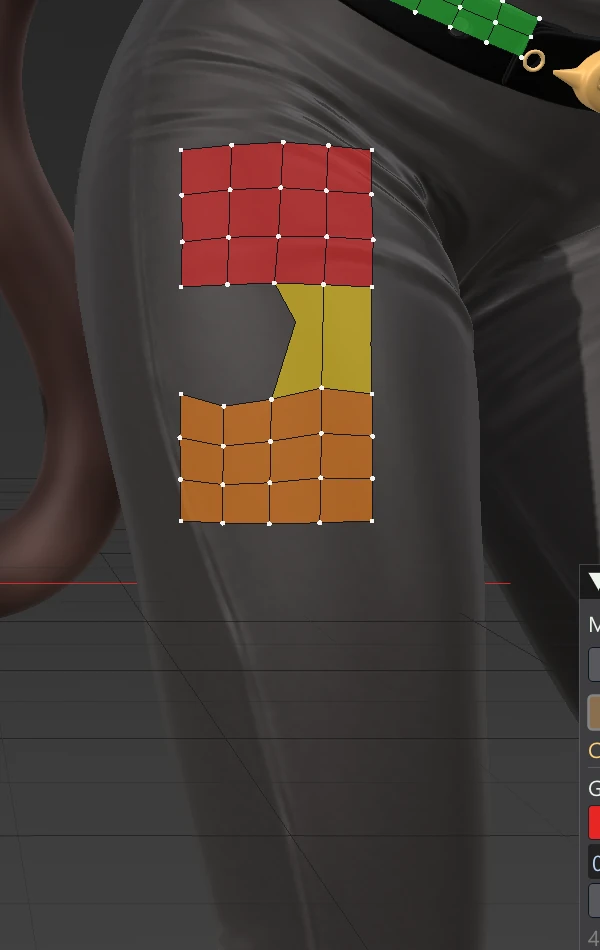
Weld (Join)
Pick two or more points (Shift+click; no tool is needed), then press the Weld button at the foot of the Join accordion, or Alt+W: they become one point, on the model between them. A quad that loses a corner this way becomes a triangle; one left with fewer corners is removed. Beside it, Join Faces does what Alt+Z does to picked faces (see Join). Both buttons stay greyed out until enough is picked; both work whatever tool is on.
Settings > Keyboard Setting, Quad-Patcher, can change either key.
Points that sit in the same place as another — a point snapped onto another while dragging, for one — are drawn red, ringed white, until they are welded. When a drag ends snapped, the points at that place are picked for you and shown as a red circle twice the size: just press Alt+W. A weld always takes the points under a picked one with it.
The point you drop onto stays exactly where it is, on the model and on the screen. To change your mind, drag from that place again: the point you dropped comes back off, on its own, and the one under it stays. While a drag is close to another point it stays snapped until you move clearly away, so a steady hand is not needed.
Create Polygon
Pick 3 points (Shift+click) and press Alt+P for a triangle, or 4 for a quad — the quickest way to close a small gap left between patches. It works from any tool, or none (Settings > Keyboard Setting, Quad-Patcher, can change the key).
- The order you pick the points in does not matter: they are joined in order round their middle.
- The new face turns the same way as the faces beside it, and takes the current Group colour. It is left picked, so you can colour or delete it straight away.
- With Mirror Mode on, the mirrored points get their face too.
- It is refused, with a note on the status line, when two of the points are at one place (weld them first), when the points already make a face, or when one of its edges already has faces on both sides.
- Five or more points are not supported yet: the Quad-Patcher makes triangles and quads only.