
Canvas, Map Bar & Shortcuts
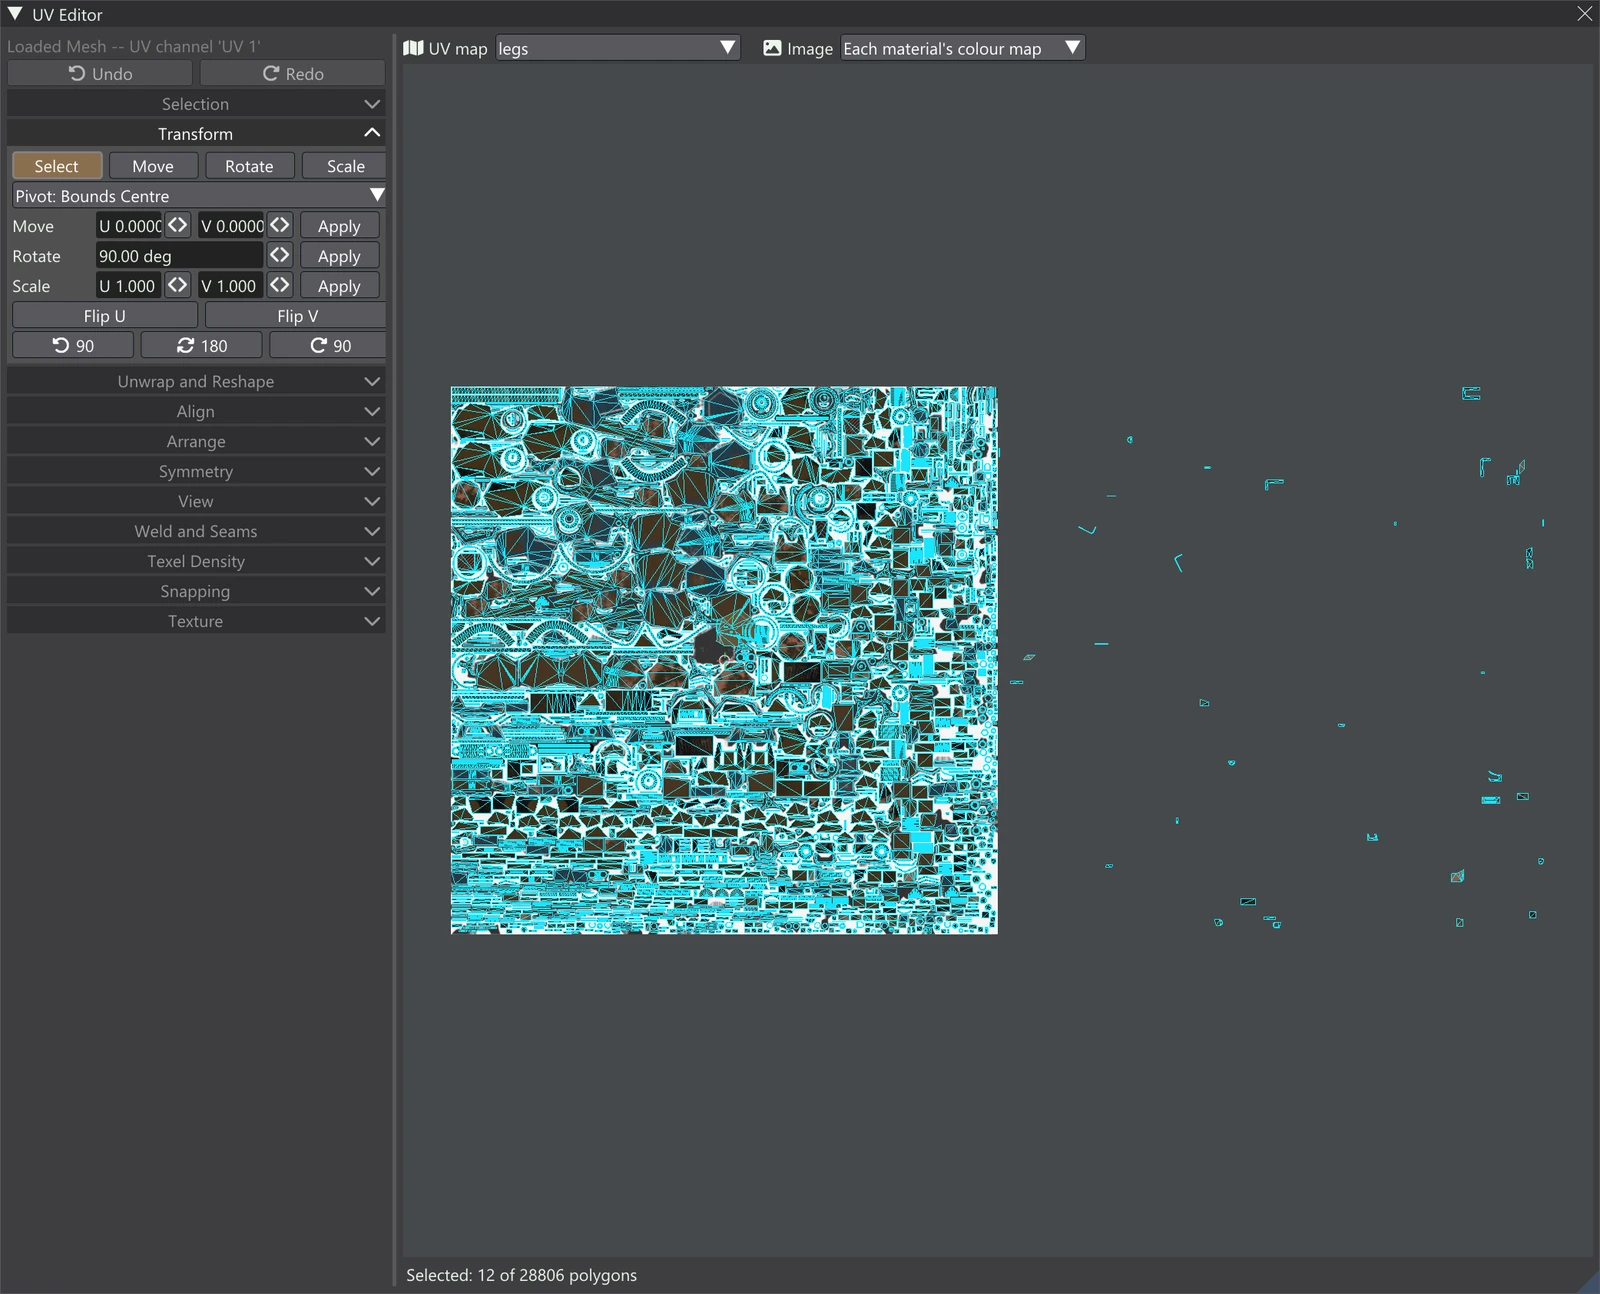
The right-hand side of the UV Editor is the canvas: the UV layout itself, where you pick, drag and transform. Above it sits a bar with two dropdowns; below it, the count of selected polygons. Everything you can do with the mouse and keyboard there is on this page, with a full shortcut table at the end.
The bar above the canvas

UV map
On the Generated Mesh, which of its named UV maps is shown and edited — UV 1, any you made with Create New UV Map, and Quad-Patcher UV, which holds what the Quad-Patcher's Create UV from Selection sent. Picking one here switches the active UV map, as the dropdown at the bottom of the sidebar does, and Generate UV Map unwraps into it. The Loaded Mesh has no such list: its UV channels are the file's.
Material
The material whose part of the map is shown and edited. The list holds every material that has faces on this layout, by name. Only one material's map is shown at a time, so the maps of different materials, which often share the same UV square, never lie on top of each other.
- Only the chosen material's faces are drawn, can be picked and can be selected. Select All, Invert, the select tools, Sync with 3D and undo all keep the selection to them, so every tool acts on that material alone.
- Choosing another material drops the selection of the one you leave (it can no longer be seen) and frames the new map's tiles, as Frame All does.
- A model with a single material shows everything, as there is nothing to choose between.
Image
The image the canvas draws under the layout. Changing it changes only what is shown in the editor — the model, the Image Viewer and the layout are untouched. The dropdown appears once the model has at least one image.
- Each material's colour map (the first row) — every face is drawn with its own material's colour map, as the model shows it. A material with nothing loaded or baked lets the tile show through.
- On the Loaded Mesh, the other rows are every image of the model, by title — a normal or roughness map, another material's image. When one file was split into two images on import (a packed metallic-roughness texture, for example), both rows carry their role in brackets so you can tell them apart.
- On the Generated Mesh, the other rows are its textures, each titled with its material's name and its role.
Picking an image also turns on Show the texture in the View accordion, since an image you chose is an image you want to see. The choice belongs to the mesh it was made for: switch to the other mesh and the canvas goes back to each material's colour map.
The canvas
The canvas draws the shown map's faces over the UV tile background. On top come the texture (when Show the texture is on), the View overlays, the wireframe, the selection in orange, vertex dots in the Vertex and Edge modes, and pins as red dots. The 2D cursor is the small circle with red and green ticks.
The keyboard belongs to the UV Editor while its window is active (click in it first). Keys do nothing while you are typing in a field.
Navigating
- Zoom — the mouse wheel, about the point under the cursor.
- Pan — drag with the middle mouse button, or with Alt+left button.
- Frame All — Home, or Frame All in View: fits every tile of the shown map in the canvas. The editor does this by itself when it opens and when you choose another UV map.
- Frame Selected — F, or Frame Selected in View: fits the selection in the canvas.
Picking
What a click picks depends on the selection mode (keys 1 to 4, or the mode buttons in Selection). What is under the cursor is highlighted in yellow before you click.
- Vertex — the UV vertex nearest the cursor, within a few pixels.
- Edge — the edge nearest the cursor, within a few pixels.
- Face — the face under the cursor.
- Island — the face under the cursor, and with it every face connected to it in the layout.
| Gesture | What it does |
|---|---|
| Click | Select what is under the cursor, and nothing else. A click on empty canvas selects nothing. |
| Shift+click | Add what is under the cursor to the selection, or take it out if it is already selected. |
| Ctrl+click | Take what is under the cursor out of the selection. |
| Drag on empty canvas | Draw a box (or a lasso, see below). What is inside replaces the selection. |
| Shift+drag | Add what is inside the box or lasso. |
| Ctrl+drag | Take what is inside the box or lasso away. |
A press that moves only a few pixels counts as a click. Whether a drag draws a box or a lasso is set by Box select / Lasso select in Selection. Inside means: vertices inside; edges with both ends inside; faces, and so islands, whose centre is inside.
The Sticky setting in Selection decides what a picked vertex brings along with it — see Sticky.
The 2D cursor
Shift+right-click on the canvas places the 2D cursor. It is a point several tools work to: Pivot: 2D Cursor turns and scales about it, and tools such as Align, Weld and the unwraps can use it as their target (see each tool's Adjust settings).
Transform handles
With the Move, Rotate or Scale tool chosen in Transform and something selected, handles appear at the pivot:
- Move — a red arrow (along U), a green arrow (along V), and a white square in the middle to move freely.
- Rotate — a blue ring; drag along it to turn.
- Scale — a red square at the end of the U arm, a green one at the end of the V arm (scale along that axis alone), and the white square in the middle to scale evenly.
The handle under the cursor turns yellow. Drag it; the change applies when you let go. While dragging, the canvas shows the result live, and holding Ctrl swaps step snapping on or off (see Snapping).
G, R and S
With the mouse over the canvas and something selected, press G to move, R to rotate or S to scale. The transform follows the mouse from where it was when you pressed the key, and a hint along the bottom of the canvas lists the keys:
- Move: X locks the move to U, Y to V; press the same key again to free it.
- Rotate: the angle is how far the mouse has swept around the pivot.
- Scale: the factor is the mouse's distance from the pivot compared with where it started. X or Y scales along that one axis.
- Ctrl swaps step snapping while held.
- A click, Enter or keypad Enter applies; a right-click or Esc cancels and puts everything back. The click that applies does not also select.
When nothing happens
The handles and the G / R / S keys need a selection and an edition that edits UVs. On Free and Light, and while editing waits on other work (see When editing waits), you can still navigate, pick and select.
The polygon count

Selected: N of M polygons — how many faces are selected, out of the faces of the UV map shown in the bar. For the vertex and island counts as well, see the line at the end of the Selection accordion.
Shortcuts
Mouse gestures work while the cursor is over the canvas; keys work while the UV Editor window is active and you are not typing in a field.
| Key or mouse | What it does |
|---|---|
| Mouse wheel | Zoom about the cursor. |
| Middle-drag, or Alt+left-drag | Pan. |
| Home | Frame All: every tile of the shown map. |
| F | Frame Selected. |
| Click / Shift+click / Ctrl+click | Select / add or take out / take out. |
| Drag on empty canvas | Box or lasso select; Shift adds, Ctrl takes away. |
| Shift+right-click | Place the 2D cursor. |
| 1 2 3 4 | Vertex, Edge, Face, Island mode. |
| A | Select all (of the shown map). |
| Alt+A | Select nothing. |
| Ctrl+I | Invert the selection. |
| L | Grow the selection to whole islands (Linked). |
| P | Pin the selected UVs (see Unwrap and Reshape). |
| Alt+P | Unpin the selected UVs. |
| G | Move, following the mouse (mouse over the canvas). |
| R | Rotate, following the mouse (mouse over the canvas). |
| S | Scale, following the mouse (mouse over the canvas). |
| X / Y | During a G or S: lock to U / to V; again to free. |
| Ctrl (held) | During any transform: swap step snapping on or off. |
| Click, Enter | Apply a G / R / S transform. |
| Right-click, Esc | Cancel a G / R / S transform. |
| Ctrl+Z | Undo the last UV edit. |
| Ctrl+Shift+Z or Ctrl+Y | Redo. |