
Sphere Chains
A Sphere Chain is a body built from balls joined by links, the way ZBrush's ZSpheres or Blender's Skin modifier work: drop a ball, drop the next one and a link joins them, click a ball to branch from it. Balls can be squashed into ovals, links can curve and bulge, and a chain can mirror itself, be posed like a skeleton and close loops. When the shape is right, send it to Sculpt as a smooth solid or as a clean, all-quad skin with edge loops round every limb. Sphere Chains are part of Voxel mode and every edition has them.
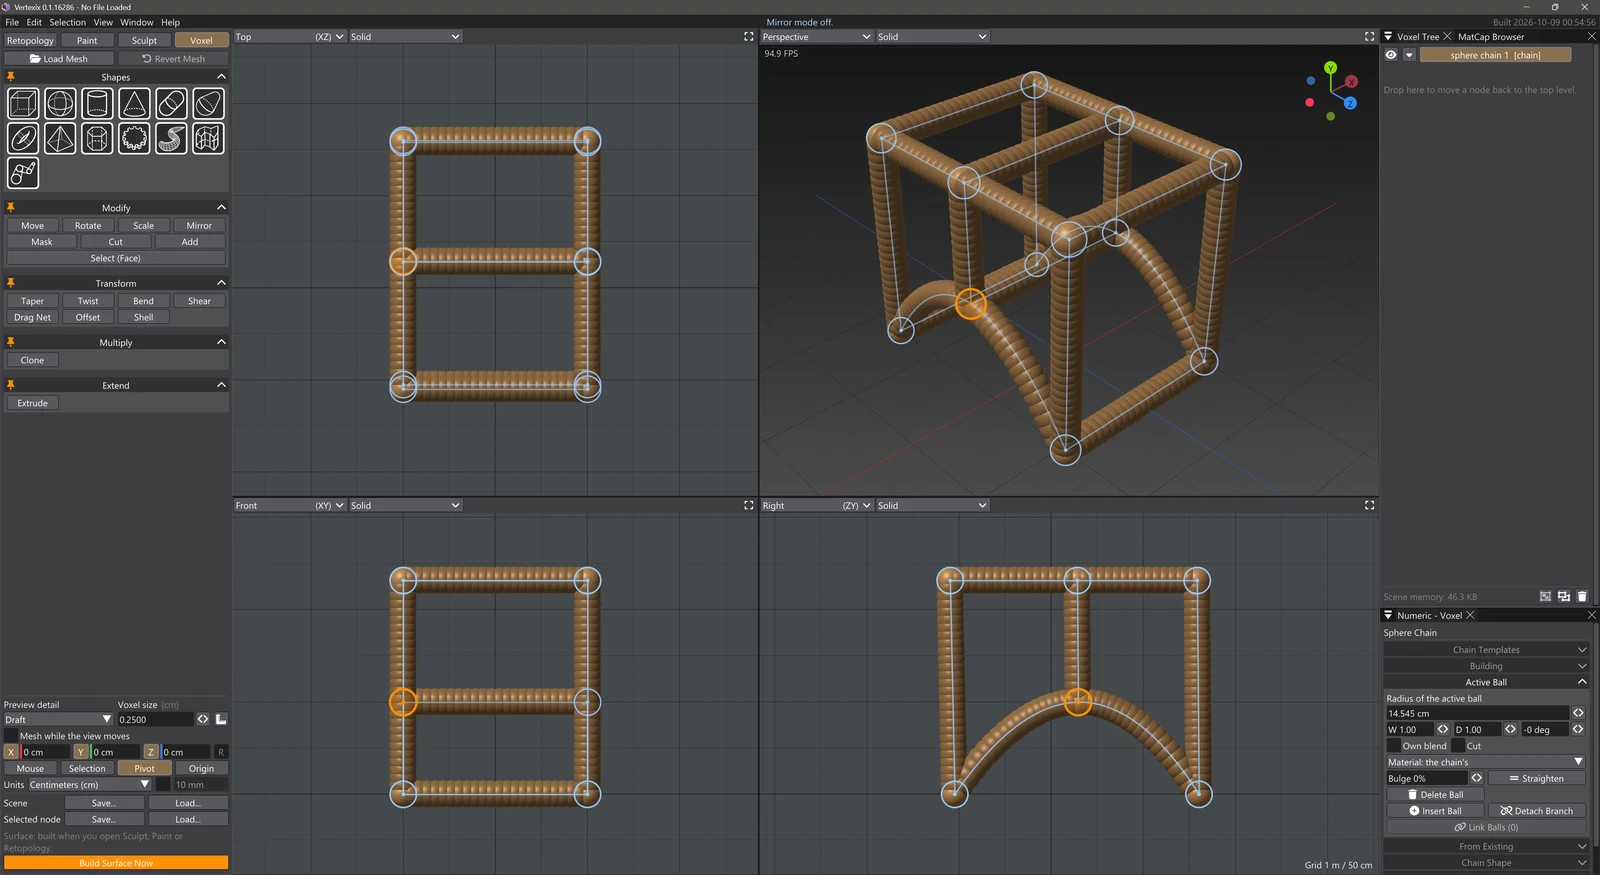
Starting the tool
Open the Voxel tab and click the Sphere Chain button — the last button of the Shapes accordion, under the shape icons. The button stays lit while the tool is on, and the Numeric - Voxel window opens on the Sphere Chain page, where all of the chain's settings are (see below).
- Click in any of the four views to drop the first ball. Each further click drops a ball linked to the active one. See Building a Chain.
- Esc or a right click lets the chain go and keeps the tool on: the next click starts a new chain, or, on a ball of any chain, a branch from it.
- Return, Space, Apply or a second click on the Sphere Chain button finishes and puts the tool away. What you built stays.
A chain is one node in the Voxel Tree, marked [chain]. Select it at any time to see its page again; with the tool off you can still pick and drag its balls in every view (see The Active Ball).
Working in the four views
A click lands on the plane through the active ball, square to the view you click in, so the Top, Front and Right views each move a ball in their own two directions. In the Perspective view, dragging the empty background turns the view round the model (a plain click there still drops a ball), and Alt+drag turns any view. Balls are drawn with a ring in every view, the active ball's lit in your highlight colour; links are drawn along their curve. Caps Lock switches the Perspective view to MatCap shading, as it does in the other modes.
The Sphere Chain page
The page is in the Numeric - Voxel window, in collapsible sections. One section is open at a time (click a section's pin to keep it open as well), and which one is open, like every setting on the page, is remembered between sessions.
- Chain Templates — start from a ready skeleton; save your own.
- Building — Place, Draw, Spline and Pose; the preview; how links are drawn.
- Active Ball — the active ball's size, shape, blend, material and link; Delete, Insert, Detach and Link Balls.
- From Existing — Skeleton from Mesh and Chain from Shapes.
- Chain Shape — proportions, blend, Join Chains and Freeze.
- Chain Pose — Rest and Keep Pose, and Sculpt's Pose joints.
- Send to Sculpt — Smooth Volume, Quad Skin and their settings.
The last three appear once a chain is selected. Symmetry has no control on the page: the Voxel sidebar's Mirror sets it (see Symmetry with Mirror).
Mouse and keys
| Gesture | What it does |
|---|---|
| Click on empty space | A new ball linked to the active ball (the first click makes the chain). Held, it drags. |
| Click on a ball | Makes it the active ball; the next ball branches from it. Held, it drags the ball. |
| Shift+click on a ball | Adds it to the selected balls, or takes it out (see Selecting & Linking Balls). |
| Shift+drag on a ball | Sizes it: up is larger, down is smaller. |
| Click on a link | Puts a ball in the link there, on its curve and at its size (Place mode). |
| [ / ] | The active ball smaller / larger. |
| Delete / Backspace | Removes the active ball; its children hang from its parent instead. |
| Ctrl+drag | Moves a ball off the mirror plane (it otherwise stays on it). |
| Esc / right click | Starts a new chain; the tool stays on. |
| Return / Space | Finishes and puts the tool away. |
| Ctrl+Z | Undo; every gesture is one step. |
From a chain to a textured model
A chain is the start of a model, not the end. The usual path:
- Build the chain, pose it if you like, and give balls their own colours with Material.
- Send it to Sculpt as a Smooth Volume or a Quad Skin. The ball colours arrive as vertex paint.
- Sculpt the detail and vertex paint it.
- Retopologize the result, make its UV map, and turn the vertex paint into image maps with Vertex to Image.
Saving
Chains are saved with the voxel scene and in single-object files, with everything about them: balls, links and their shapes, extra links, materials, the mirror and a pose's rest position. See Saving & Loading Scenes.